A lesson in music production which you hear over and over again, is to work as quickly as you can. We are often instructed to dash to reach the end of the tune before our inspiration runs out, and before we get bored of listening to the same notes and sounds repeatedly'this can be an incredibly difficult thing to achieve in practice but one way to get there is to use synth presets when building up your initial ideas. However, a common experience finds producers scrolling through presets for longer than it could have taken to build a sound from scratch! The trick' Scroll until you get to a ballpark sound and then tweak the preset so it sits just right in your mix.
In this tutorial for Native Instruments' Massive, I'm going to dive into the inspiring, speed-conscious world of synth preset modification. To demonstrate my production tips, I'm going to be using the Synth Chord preset, 'Clarity' from our Exposure - Massive Deep House Presets release (you can download the modified version as a free Massive synth preset at the end of this article). Each ModeAudio preset has all 8 macro controls assigned to give you instant control over the distinctive features of the sound, but there are often some other adjustments you can make to elevate a preset to perfection for the context you're using it in. Let's begin!

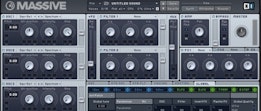
1. Massive Preset Selection: At the Ballpark
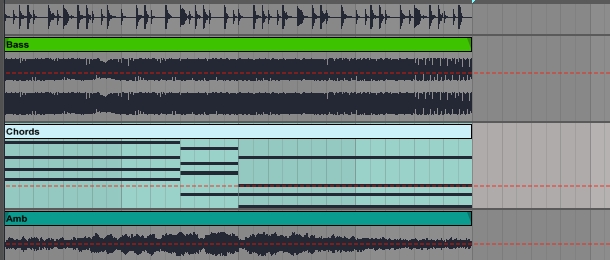
Take a listen to the 4 bars above - it's an ambient music production, with the drums, bass and synth lead parts already in place. What I need is something to play the harmony part with and with Massive being my go-to synth for this sort of musical element, I've loaded it up on a spare instrument track. I've got my MIDI notes ready and have chosen a preset by flicking through some Massive patches until I found something soft enough to fit with my ambient production context. Here's the preset, with my chords:
And here it is playing back with the rest of the track:

2. Massive Macro Controls: Big Steps
As you can hear, the preset is very smooth and not far away from being a collection of pure sine tones. The low pass filter is what makes it sound like this - it's removing most of the grainy high-end which comes from the 'Groan I' wavetable in Massive. I want to make this preset sound a little more degraded - firstly, I've adjusted some of the macro controls to get me closer to the sound I want. Then, I've turned the delay right down, pushed the low pass filter cut off frequency up a little, dialled the tuned ring modulation down a touch and brought in a tiny bit of detuning to thicken things up. Give the updated patch a listen:
3. Massive Design: Homing In
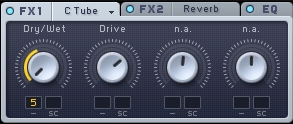
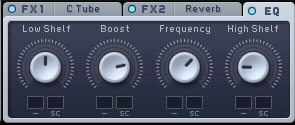
I'm fairly happy with the basis of the sound but it's a still a bit too polite - let's get a little messier! To make this sound a bit dirtier, I've added some tube distortion and then toned down the highs in the EQ, with some boosting to the upper mids to make it sound a little more like it's coming out of an old, vintage speaker cabinet.
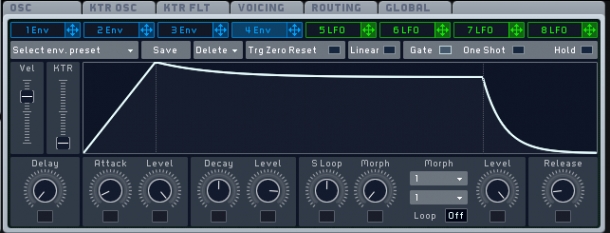
Listening back with the other instruments, it seems to me that the sound dies down a bit too much, leaving something of the hole I was trying to fill. The solution is to raise the sustain level on the main amplitude envelope, number 4. This keeps the level much more steady through the course of the chords. I'm also going to lengthen the reverb time a bit so it's similar to the one I've used on my synth lead - now we're ready to go!
Here's my final, tweaked Massive synth preset heard in context, with the other ambient elements:
So, you can hear that some pretty simple adjustments can take us where we need to be musically, in almost no time at all! To get you started on your own synth preset tinkering and experimentation, here are some other important controls to pay attention to in Massive when tweaking a sound to perfection:
1. Attack/decay times: it's amazing how much influence these can have on whether a sound fits or not with flow and feel of your music!
2. Modulation oscillator tuning: -12.00, 0.00, +12.00, +19.00'these values can sound great when you use them for the ring modulator (choosing microtonal values will give you wackier, inharmonic results which might work better for SFX or otherworldly textures).
3. Low pass filter cut off frequency: this control can help you tame an overly bright sound, producing a mellower result.
4. Reverb wet/dry: adjust this synth parameter to move a sound further back in a mix, or bring it centre-stage.
5. Wt-Position: moving the wavetable position by only a small amount can give you just that little bit of spice you were looking for. If you're using multiple oscillators, try muting them to effectively solo a single tone generator, then you can tweak each wavetable position more carefully in turn.
There we go! I hope you find these Massive sound design tips useful next time you're scrolling through those presets and get inspired with the possibilities that now present themselves. The sky's the limit so, as ever, get creative!
The loops used in this tutorial can be found in our Reflect - Ambient Loops pack and simply use the button below to download the Massive preset and MIDI notes used also.