
Sampler kits, effects and MIDI - they're pre-made tools designed by us to get you making beats more quickly, but how exactly can you go about getting the most out of these bonus sample pack features?
Almost all the sound packs we offer here at ModeAudio include some form of additional content such as MIDI files, drum kit patches and audio FX racks. These can be used as you find them in your download but in this article I want to demonstrate a couple of ways that you can use these tools outside the box.
I’ll be using two of my favourite drum sample packs of ours, Bulb - Analog Drum Samples and Hybrid Drums - Live & Electronic Drum Samples, for this purpose, each of which comes with a comprehensive set of diverse drum hits, sampler patches, MIDI files and channel strip settings.
For this demonstration I’ll be using the Ableton Live versions of the packs but the ideas can of course be carried across to the other available DAW format options.
Getting Off The Ground
First, let’s load up the Hybrid Drums Ableton Live set file (ModeAudio - Hybrid Drums.als). You can find this in the top level of our Ableton folder once you unzip the main file.
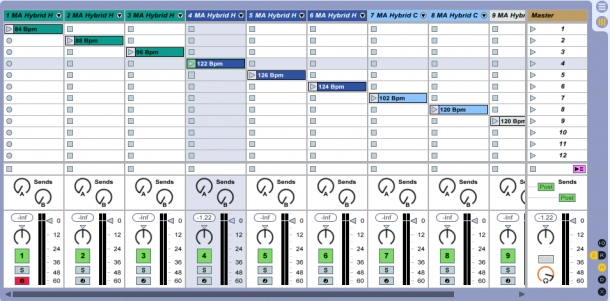
As you can see above, once the set is open we’re presented with a whole host of drum racks and a MIDI pattern to demonstrate each kit. For this article I’m going to select the fourth kit/pattern from the left - this is the MA Hybrid House Kit 1 and its accompanying 122 Bpm pattern.
Here’s how it sounds just now:
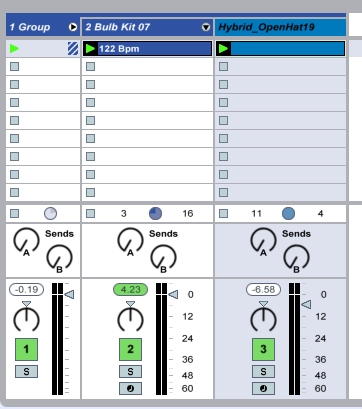
Now I’m going to take this MIDI pattern and plug it into a different kit. I want something with a bit more of an electronic/Techno feel, so I’ll load up a kit from the Bulb pack. I can do this by going to the Browser panel on the left-hand side, opening my Bulb pack, and locating the kit I want in the Drum Racks folder.

I’ll now drag the .adg file across to the session view window and onto the track title bar of the channel where my MIDI pattern is.
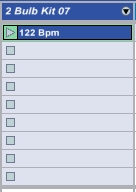
Let’s ramp up the song tempo to 130, for a more Techno-like feel, and hit the play button to see how that sounds:
As you can hear, the vibe of the beat has completely changed just by plugging the pattern into a different drum kit, as well as lifting the tempo slightly. It actually feels a little too busy at this new, faster tempo, so let’s double-click on the clip on our track to open up the piano roll to edit the beat.
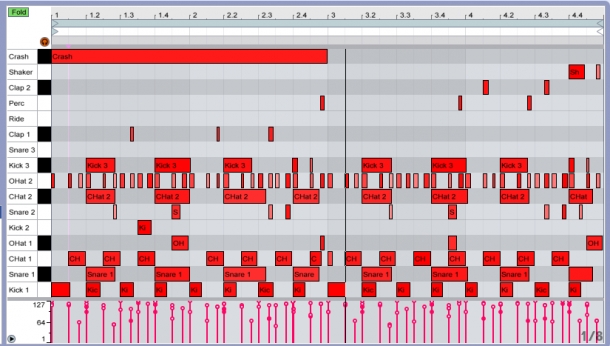
Here’s what we see:
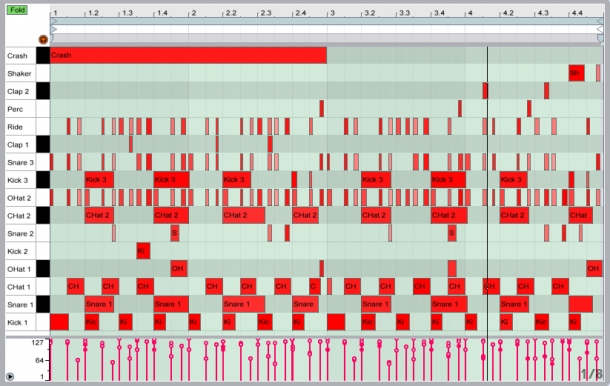
There are a lot of things going on in this clip! I want to go for a more stripped-back, minimal sound here, so I’m now going to take out some of the more prominent, busy instruments to simplify the overall pattern.
The ‘Ride’ and ‘Snare3’ stand out for me the most. There are a couple of ways to remove them - we can either mute the corresponding pad on the device, or we can actually delete the MIDI notes in the piano roll.
I’ve opted for the latter, as I may want to write some different rhythms onto those instruments at a later point.
Here’s the new pattern on the piano roll:
And now let’s have a listen:
The beat is much simpler now and, I think, more effective! The various percussion parts have a bit more space to breath, which also leaves room for us to add in some melodic instruments if we want.
Introducing Some Effects
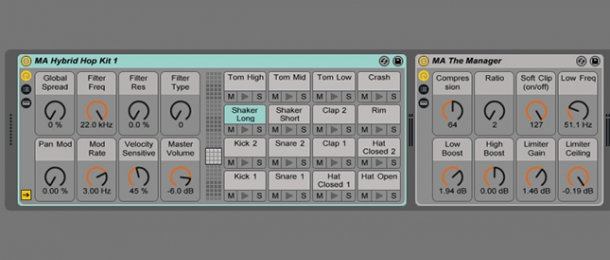
Now that our beat is heading down the big room, dark Techno route, I want to add a bit of dirt to the sound. Next up, from the Hybrid Drums pack, I’m going to add the MA Broken Record audio FX rack.
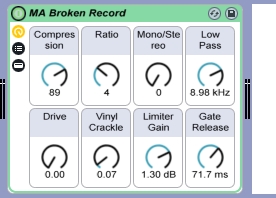
As you can see above, this module adds a bit of compression, a touch of vinyl crackle and also rolls off the top-end frequencies slightly, giving a subtle lo-fi quality to our beat.
It's subtle, which is what I want here, otherwise I could crank the settings a bit more - you can just hear the slight difference in our new, processed groove:
Moving on, I now want to add in an open hi hat sample on every off-beat. There’s a really nice hi hat I’ve found in the Hybrid Drums sample folder, so I’m going to create a new, separate channel, load in an Impulse instrument with the sample included, and create a MIDI clip to go with it:
Here's the MIDI pattern or clip for this hi hat sample:
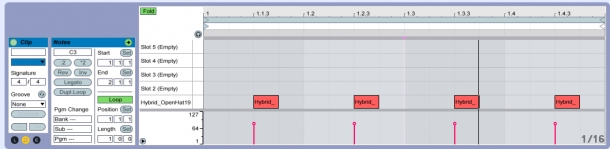
Here’s what our loop sounds like now:
I could of course have replaced one of the samples in the existing Bulb kit with the new hi hat sample, but again I want to keep those initial samples available in case I want to programme them in further down the line.
Building Tension
Next, I want to play with the controls for the sounds in my Bulb kit to introduce a bit more variety. Our kick is sounding pretty damn heavy right now, but I want to bring it in and out of focus, so that it really hits hard when it drops. If I open up the Bulb kit and select the kick pad, I can play with the Decay setting to adjust the length of the kick.
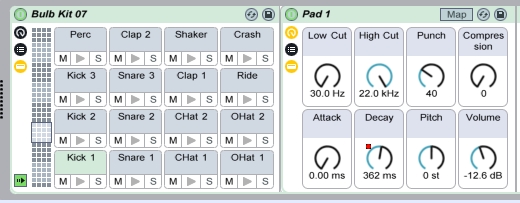
In the screenshot above, I’ve pulled the decay back to 362ms, and introduced some automation so that it quickly jumps back to full throttle after 8 bars. Now, when the kick finally drops, it sounds heavier than ever and is sure to drive dance floors crazy! We can use this trick throughout a whole track to create and release tension.
Here’s how this sounds:
Going The Distance
Finally, as the icing on the cake, I’m going to drop the MA Distance audio FX rack from Bulb onto a return track, adding a bit of reverb to our groove. As it stands, the beat is quite dry and overly present. Since I’m going for that cavernous Techno sound, a subtle addition of reverb should help to prime the beat for that big-room environment!
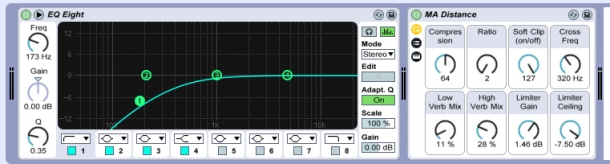
The screenshot above shows our MA Distance rack introducing a small amount of reverb, preceded by an EQ that will cut out the bass frequencies, so we don’t produce an overly muddy sound. I’ll then feed the signal from our beat channel to this return track and mix a subtle amount back in to the overall mix.
Here's the result:
And there we have it - in a few simple steps, we’ve taken a handful of tools from a couple of ModeAudio packs and created the beginnings of a Techno monster!
Hopefully I’ve demonstrated how quickly you can get your creative juices flowing using the samples and additional tools presented in our sound packs. Just by mixing up different packs and genres, playing with tempos, removing and adding in the odd sound and so on, we can really start to put our own stamp on the resulting sound.
Of course our kits and racks can be used as they come in the pack but just a little bit of tweaking can go a long way - give it a try and get creative!


