
Today's Guest Post comes from C_Quin, producer, blogger & one half of 3rdPersonProd.
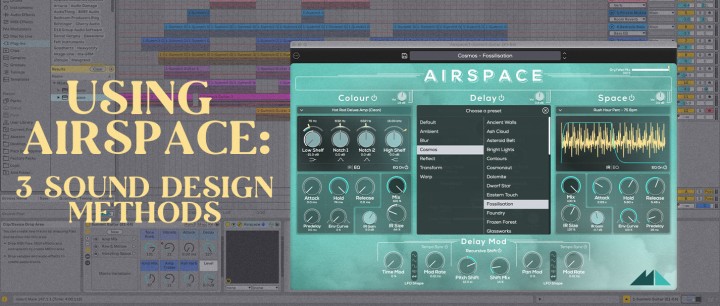
Airspace from ModeAudio is a multi-modal sound design tool that does more than your average reverb plugin.
Featuring four modules, Colour, Delay, Space and Delay Mod, Airspace distinguishes itself from the pack by operating as an all-in-one creative spatial sound design station. Each module serves a different aspect of the character of your sound, which offers up a comprehensive variety of sound design options.
In this article, I’ll be taking you through 3 sound design methods utilising Airspace to help you craft engaging tracks that will bring your listeners back again and again!
Think of these 3 methods as recipes, because they can easily be recreated by you in your DAW to produce a similar outcome. I’ll provide screenshots as well as sound examples along the way to help you with the particulars.
Prep Makes Perfect
Before you start, you’ll want to first choose your impulse responses as well as your approach for the needs of your track.
For those who don’t know, impulse responses concern two central elements; the impulse (the initial impact of sound) and the response (how the environment responds to the sound). For example, if you stand in a cathedral and clap, the clap is the impulse, and the resulting network of resonances or reverb is the response of the cathedral environment to the impulse.
The guitar community has long taken advantage of this concept to digitally recreate the response, or sonic character, of different guitar amps and cabinets, though its use has since expanded to take in much more experimental sound design processes and techniques. Such is the case with Airspace!
Firstly, let’s briefly break down the plugin's reverb sections, Colour and Space.
Colour and Space are identical reverb modules that both have access to ModeAudio’s rich library of impulse response files, and can be purposed to your liking. Let's explore some examples:
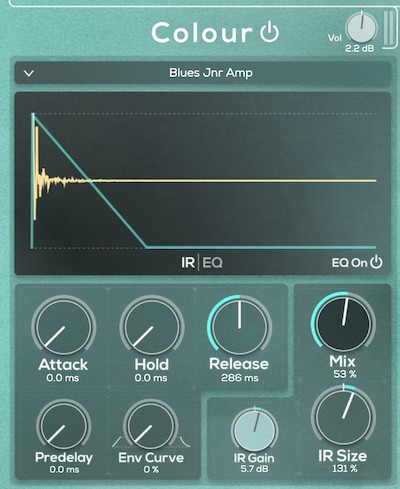
In the above image, Colour is implementing a short impulse response with a fast attack, no hold, and medium release. The idea here is we're subtly changing the character or 'colour' of our input audio signal, rather than adding any discernible sense of space or reverb, hence the name of the section.
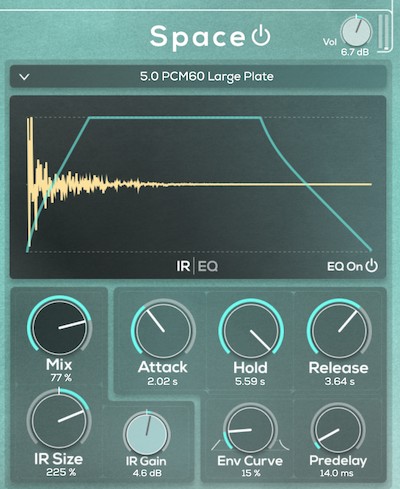
For the Space section, here we have a longer impulse response with a slow attack, full hold, and long release; this will add a long reverb tail to whatever sound we then run through the plugin, creating a sense of sonic space, depth and atmosphere.
I personally like to utilise Colour and Space according to their namesake: Colour for shorter impulse responses that reflect the tonal qualities of the loaded impulse, and Space for stretching and opening up the sound.
Now let’s talk about some practical uses for Airspace in the context of sound design.
Method 1: Ambient Sound Beds
Whether you’re building a Techno track or an Ambient track in and of itself, creating ambient texture underneath or above whatever else you have happening in your arrangement is often the special sauce that helps distinguish particular songs from others in a similar style.
For example, you could listen to Looking at Your Pager by KH (aka long-time ModeAudio favourite Four Tet) and just hear the percussive elements and off-kilter vocal, and not directly notice the repeating background sample of that vocal that provides a kind of rhythmic underpinning to the other elements.
Really however, this loop is essential to the track’s catchiness, and if removed there just wouldn't be the same sense of atmosphere and drama.
Later on at 1:26 into the track, an ambient synth part appears that reflects the song’s chord progression - it provides an essential change in the song that draws the listener in closer and it gradually surfaces to the forefront of the song when the vocal drops out, before coming back for the final verse.
Before we start experimenting with Airspace, it might be a good idea to consider that your average listener may not pick up on the underlying ambience of your track in a conscious way, like in Looking at Your Pager, but the fact that these elements are in the mix has an influence on the feelings and emotions the music can evoke.
So, how would we do something similar in Airspace? One way we could do this would be to use the plugin to 'smear' a main melody line in your track and placing it far back enough in the mix to be noticeable as a complementary element.
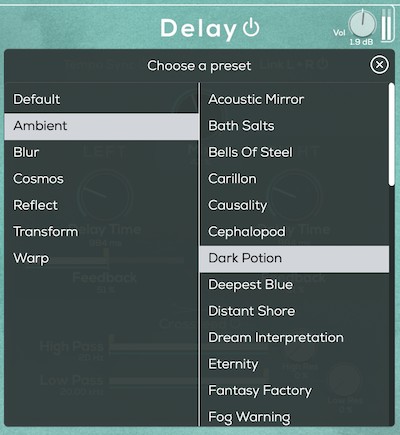
Airspace has an extensive bank of over 240 presets, so for this recipe, let’s direct our attention to the preset in the Ambient bank called Dark Potion:
Here's the sound we're going to be using Airspace to process i.e. a type of lead melodic sound; the sample in its dry state has a lot of higher frequencies, as it’s a bell sound:
It’s a nice melody and could perhaps be part of a song, but maybe you’re wanting to find a way to transition from melody to an outro for the end of your track, or as we discussed above, a textural ambience to sit in the back of your mix and add depth.
Here’s how the bell sound is transformed by Airspace's Dark Potion preset:
As you can hear, there’s a definite sense of the tonal qualities of the source sound, but they resemble quiet waves now, sort of like a 'memory' of the sound. Additionally, there is also a sense of space to the sound. Some of the higher frequencies have also been filtered out, which is nice.
This would make a great bed to place other elements of a mix over; even the original bell sound itself. In fact, the two could be easily mixed between using Airspace's master Dry/Wet Mix slider.
I would strongly recommend spending time just clicking through Airspace's presets, bypassing sections to better understand all of what the plugin has to offer in terms of sound design.
Method 2: Rhythmic Effects with Delay
Within Airspace there are a couple of key controls that, when configured, will result in an overlapping or reversal effect. Our focus here is on the 3rd and 4th of the plugin's main sections, Delay and Delay Mod.
For this recipe, don’t worry too much about the controls for Colour and Space, but do make sure your IR Size is at 100% or at least not so radically altered as to muddy your source sound and make it unrecognisable.
Now to the Delay Mod section - leave the Pitch Shift and Pan Mod controls off here, and we’ll discuss Time Mod in a minute, but leave this off too.
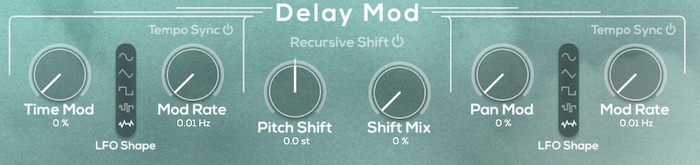
As you can see above, everything is off in this section; now direct your attention to the Delay module:
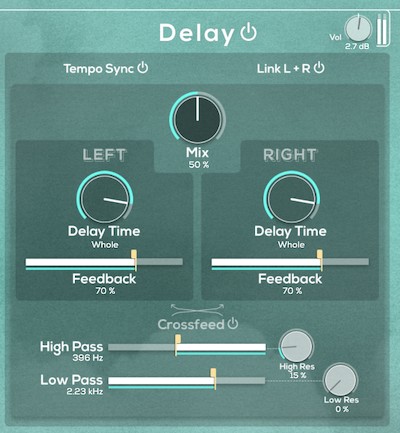
Turn on both Tempo Sync and Link L+R. This will avoid you getting confused about what the left and right delays are doing and make the sound cohesive, as well as rhythmically in sync with the tempo of your DAW project.
Additionally, turn the Mix to 50% and your Feedback to 70%. Keep Crossfeed off also. Now let's experiment:
What you’re hearing in the audio sample above is me turning up the delay time a bit. You’ll notice that once the input catches up to the new tempo, it starts to overlap on itself and become sort of like a reversal of itself.
And there you have it - a simple method of implementing a reversal effect on your track. Now, if you want to, you can introduce some Time Mod into the equation, which will add an additional repeating effect.
In this clip, I have the settings for Delay just as they are, but I’m turning up Time Mod and Mod Rate slowly, with a Sine LFO shape selected. For this example, I kept Tempo Sync off for more of a free-form effect.
This builds additional complexity into the delays or repetitions, creating an almost 'gargling' like effect.
Method 3: Textural & Pitch Effects with Recursive Delays
We've now arrived at recipe 3 - as we've already demonstrated in the previous recipe, one of Airspace’s most useful assets for sound design is its Delay Mod module. We briefly touched on this section above, but let's dig a little deeper - Delay Mod is made up of 3 sub-modules:
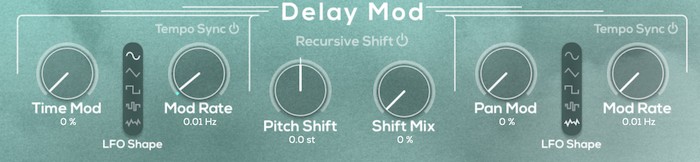
Time Mod - applies the output of an LFO to the delay times specified in the Delay section.
Pitch Shift - applies a pitch-shifting effect only to the delayed part of the signal running through the Delay.
Pan Mod - as the name implies, modulates the stereo positions of the left and right channels by either a tempo-synced or Hz-based frequency.
Within the pitch shift section, we also have a Recursive Shift On/Off button, which actually applies the specified pitch shift amount to each successive repetition of the delayed signal. So, if +2 'st' or semitones is specified, then the first delay repetition will be shifted by 2 semitones; the 2nd repetition by 4 (2 + 2); the 3rd repetition by 6 (2 + 2 + 2) and so on, until the signal fades to silence.
Now to demonstrate - here is our dry source sound:
The Pitch Shift section on its own can create granular-like shimmer effects by pitching the wet, delayed signal up or down the scale. The Pitch Shift knob can be adjusted by semitones either two octaves below the root note (all the way to the left) or two octaves above (all the way right). The Shift Mix knob blends the pitch shifted copy of the delayed signal in with 'dry' delayed signal.
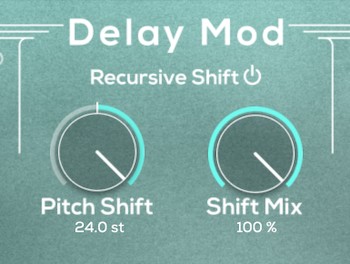
In technical terms, when the Recursive Shift function is on, it moves the Pitch Shifter from directly before to actually inside the delay loop, creating that recursive, glissandi-like effect.
Now, this is an extreme example, but here's how our source signal sounds once it has been run through the Delay section with a 2 octave recursive pitch shift applied:
As you can hear, it’s like there’s a little choir inside the delay singing along at varying pitches!
Final Word
What are your thoughts on these techniques? Have you considered using them before, and how would you implement them into your workflow?
I love Airspace for being a multi-modal reverb machine, which gives you lots of options while saving on CPU resources. You won’t have to stack multiple plugins or spend a bunch of time bouncing tracks down - you can stay in the flow of sound design.
If these techniques sound interesting to you and you’d like to implement them in your music, consider downloading the free trial of Airspace or grab a license here!


