
Drones, textures and sonic ambience - there’s nothing quite like ‘em! For chart or dancefloor-friendly music, they are often the rich, layered canvas upon which the more immediate musical elements are painted - for the Ambient genre, they are its entire essence.
Ambient textures are the pride and joy of our royalty-free sample & preset collection, as well as the ingredient I’m most readily drawn to in the music I enjoy. I want to share some more of this passion today by outlining a handy method you can use to create deep drones and background layers for your tracks.
Of course, there are myriad ways you can go about creating drones in your productions, but if you make rhythmic, beat-based music, one of the more interesting methods can be to use the material from your synth and melodic parts.
All you need is a synth part, a reverb plugin and some send buses setup - let’s dig into the details below!
1. Choose Your Synth
A quick caveat - I’m going to conduct my Ambient experiments in Logic Pro X, but you can of course apply exactly the same technique in any DAW you care to try it in.
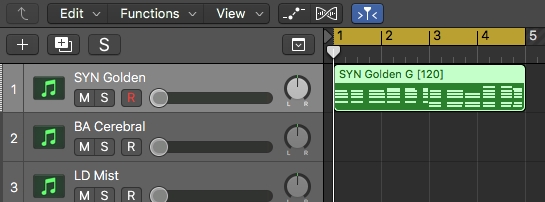
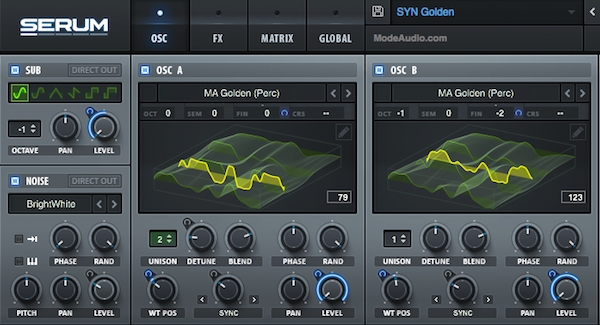
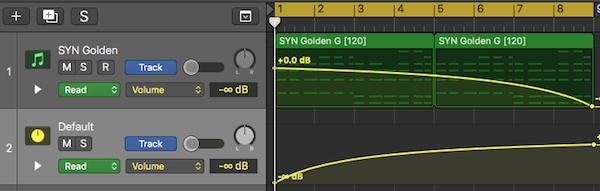
To begin, let’s say you have a synth part in your track that you like the timbre and tone of. Here’s a synth preset called ‘SYN Golden’ and MIDI part from our Collage - Serum Electronic Presets pack without any additional work that I'm going to use in my demonstration:
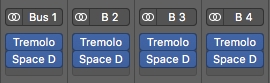
Now, say we want to turn this into a murky, misty wash of ambience that nevertheless retains the spirit of our original chord progression - let’s start by sending the synth part’s signal to 4 different buses.

I want to send the signal to the buses regardless of the main volume of the synth part’s track, so in Logic Pro X I can click on the bus and change its signal routing to ‘Pre Fader’, bypassing the synth’s own track volume.
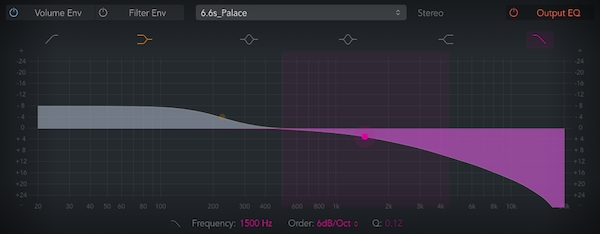
On the first bus, let’s call up a stock reverb plugin - in Logic I prefer to work with Space Designer, as it lets me move from real-world to synthesised sound depending on the impulse response file I choose.
We want to really spread the sound out, so choosing something with a long decay is important - I’ve gone for the ‘Big Cave’ preset, which sounds like this:
So far so good, but this just sounds like a synth part run through reverb, so let’s move on to adding some more layers and depth.

2. Adding Depth With Multiple Buses
On the other 3 buses, copy your reverb plugin and choose different impulse responses / presets / settings for each. The skill of this technique lies in finding complimentary layers that work well together, contributing something new to the whole and not simply just muddying up the sound.
Space Designer is great for this as we can choose a sound that is very natural, all the way through to very artificial and strange sounding, depending on the impulse response preset selected.
We can also play around with the effect’s onboard EQ to further sculpt and shape our various layers, giving them their own distinct flavour and feel.
I’ve gone for two more fairly blurry reverb sounds, with the 3rd reversed to add a bit more rhythmic interested and spice. Here’s how they interact:
I like how everything is coming together here, but I want a bit more movement and evolution in the mix. Onwards!
3. Adding Movement With Tremolo
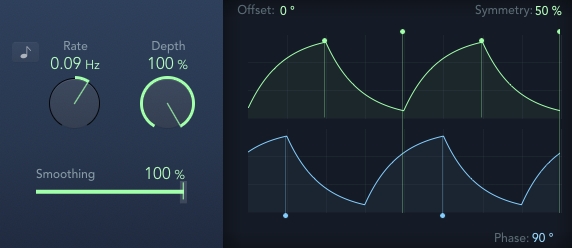
I really just want these layers to move in and out of focus a little, which should add some depth and momentum to the overall sound. To achieve this, I can use Logic’s Tremolo plugin, which rather than fading the sound in and out, I’m going to use to slowly pan each layer from left to right.
After setting up 4 Tremolo units on each of my send buses, I can make sure the layers never quite match up in terms of their gradual panning by setting the rate and depth settings differently per layer.
This results in a smooth shift for each layer, creating an effect a bit like waves lapping and overlapping the shoreline. Here’s how this sounds:
There we go, a nice, deep drone, cooked up in just 3 simple steps!
4. Applications & Alternatives
Now we’ve setup our Ambient drone, we can use it to creative effect within our DAW session. One nice application is to smoothly shift from the original synth part into the drone, like this:
This technique can of course be applied to any other part of your mix you care to try it with. Here’s my drone setup fed by an Arp preset, ‘LD Mist’ also taken from Collage, instead:
The above just scratches the surface of what can be done with this simple idea, why not extend things by adding different processing effects to each layer? Here's the same drone setup but with chorus, phaser and delay applied to the various send bus layers:
As I said above, the impulse responses or reverb presets you choose to work with are key here, and the trick is to find tones that compliment each other and are in balance with the whole.
And of course, the underlying source sound will impart the intrinsic sonic characteristic to the entire affair, so choose wisely to conjure deep, satisfying Ambient drones within your music - until next time, get creative!


