
Today, I want to show you how to use Ableton Live’s stock Sampler to create a simple yet expressive instrument, all built from a single, long sample. The basic concept is to take an extended sample or loop such as a drone or pad, chop it into small pieces and then map it within a sampler for playback linked to MIDI velocity.
The finished result is a micro instrument that will change its timbre and texture depending on how hard you hit the keys on your MIDI controller - perfect for quick melodic riff generation, track sketching and a whole host of other functions. It's quick, easy and useful to do once you know how, so let's get started!
Sample Digging
To begin, let’s find a sample we can use. Anything that contains a consistently pitched sound, albeit containing gradual fluctuations in character, is ideal for this purpose, such as drones, pads, strings and so on.
I've found a sample from our Eclipse - Dark Ambient Samples & Drones release, which is packed full of just such sounds. This sample contains a single C# note held throughout, which evolves subtly in timbre over time - here's how it sounds:
This is just what I'm looking for - so let's take it into Ableton Live for some tinkering!
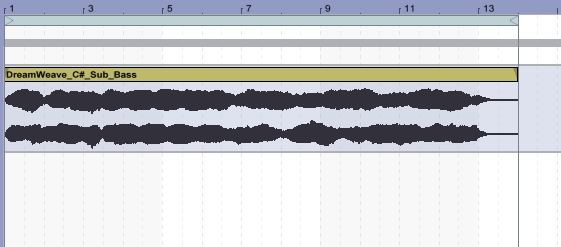
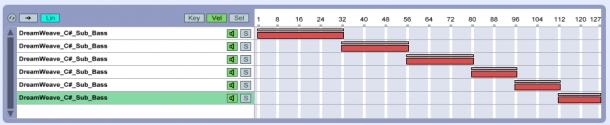
After we’ve loaded the sample onto an audio track in Ableton, we’re going to skip through the file and locate a variety of different sounds that we want to extract for importing into Sampler. Snipping the file at different locations in Live's arrangement view will then give us the basic building blocks for our instrument.
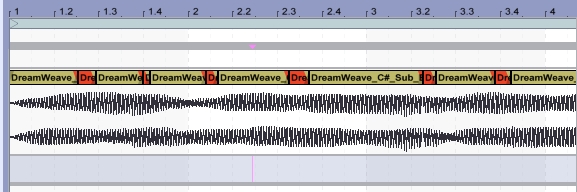
In the screenshot above, you can see that we’ve identified 6 clips (in red) that we want to use in our custom micro instrument. Here’s how the individual clips sound on their own:
You can hear that although they all appear to come from the same source, there's variation and movement in terms of filtering, amplitude envelope and so on, which will give our micro instrument its nuance.
Entering The Zone
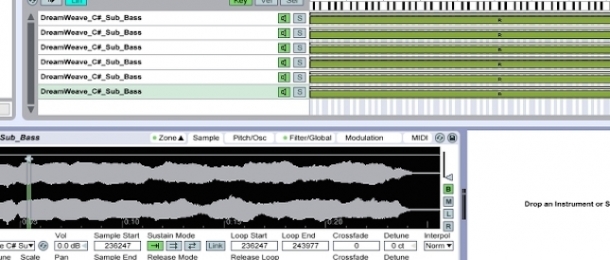
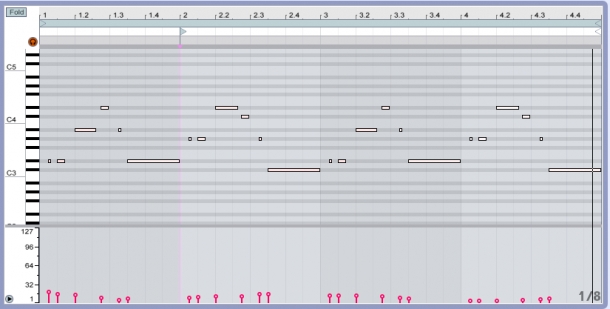
The next step is to create a MIDI track and add Live’s ‘Sampler’ instrument to it. Click on the ‘Zone’ tab to open up the Zone Editor, then begin dragging the clips into the Sample Layer List one by one.
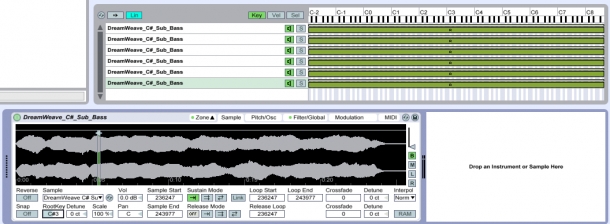
In the screenshot above, you can also see that we’ve adjusted the RootKey parameter in the Sampler to C# so that it matches the original sample - this makes sure that our synth is tuned correctly as a standard keyboard instrument.
Next up, we click ‘Vel’ to open up the Velocity Zone Editor and begin defining when each sound should be triggered, depending on Note Velocity. We do this by hovering over each end of the red bars until the cursor turns into a ‘bracket’, we then drag the bars to the desired range.
Clips in the lower velocity range will play when a key is tapped lightly and clips in the higher range will play with a more forceful touch.
Now we can hook a MIDI controller/keyboard to our setup and start messing around with note velocities to see how it sounds - this is the power of this incredibly simple technique, it involves intuition and serendipity which moves things away from the monotony of dragging and clicking to achieve the desired result!
Here's what my initial jamming sounded like:
So you can hear that with a bit of further exploration, we'll be able to create something that sounds homogenous yet contains internal movement and life.
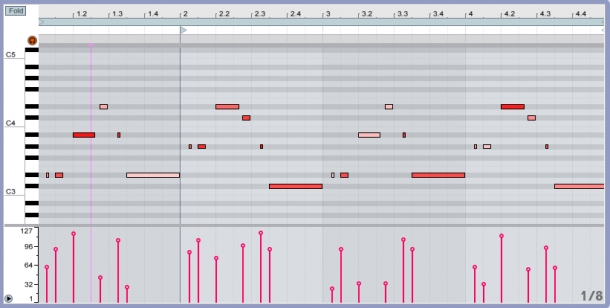
Let’s try creating a bass melody to demonstrate our new instrument. I’ll also add some compression and a bit of reverb to spice up the sound a little, once it's ready. Let's keep the velocities within 1 range (1 sound clip) for now just for the purpose of demonstration.
Having played around with a few pitches and done some quick editing, as well as adding compression and reverb, here's what I've arrived at:
Now we have the melodic part of the bass riff down, I just need to adjust the note velocities to add some sonic variety.
Here's how this sounds, with the different sample layers being triggered:
As you can hear, the second example is much more interesting and allows you to be much more expressive, particularly when recording melodies live with a MIDI controller.
Of course, I could go in and add fades or manually edit amplitude envelopes to produce a more polished effect, but I actually like the raw, clicky sound I'm getting with this riff so far.
Finishing Touches
Just to complete the idea, let’s add some drums from our Crystalline - Serum Cinematic Dance Presets and a nice pad from the Massive synth so we can hear our bassline in context:
Simple, quick, yet expressive and full of vibe! Good luck with your own experiments and get creative - don't forget to check our catalogue of royalty-free sounds if you're in need of some raw material.


