

Every producer needs a diverse palette of sounds to create music from but some of my absolute favourites to work with are ambiances and tonal textures. Rich with atmosphere, a sense of space and sometimes a sprinkling of dusty sonic crackle, musical ambiances are sustained pad-like sounds that rest on a single tonality or spectral profile. Tonal textures are similar in the sense of the atmosphere they bring to your music, but they contain clearly defined pitches than can be used to build up chords and progressions.
In this article, I'm going to show you how to layer and sculpt this kind of sonic material so that you can make lush, ambient backgrounds to lend your music a feeling of warmth, depth and space. I'll demonstrate my music production tips using examples as we go - I'll be using samples taken from our Density - Ambient Samples & Drones release to do this because it's simply packed full with just the sorts of tones and textures I want to show you how to work with. Let's get started!
Concordant Sample Layers
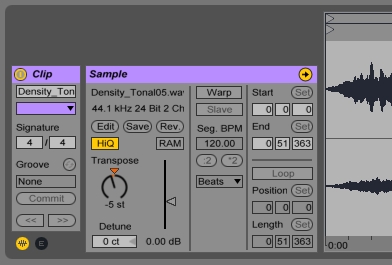
To begin with, I've got a nice, long tonal texture sample from Density duplicated across two tracks in Ableton Live. It's a flute-like sound that starts with an internal major chord tonality - have a listen here:
I want to pitch-shift one of the tracks, as layering differently shifted versions of the same sound is a great way to build something more dynamic and complex from a sample like this. However, because the sample is tonal (in this case, major), only certain degrees of pitch-shifting will sound good when mixed back in with the original sound. Shifting by octaves (either + or - 12 semitones) will obviously keep the major tonality intact without introducing discordant pitches, but it's not an especially interesting harmonic development (though it is great for deepening the bass or brightening your highs).
Instead, I'm going to stick to shifts from the original, I (in numerals as chords that belong to the same scale are referred to in this way), to either V or IV, that is, +7 or -5 semitones for V, and +5 or -7 for IV (depending on whether you go up or down the octave). So, if the pitches audible in the original major chord sample are C, E and G, shifting to V will give us the notes G, B and D (i.e. + 7 semitones). Shifting to IV, meanwhile, would give us the notes F, A and C (i.e. + 5 semitones).
What's important here is that in the key of C major, both the V and IV chords (G major and F major) are also major, so we don't get a discordant note - a note that is not in the key of C major. In the image above, you can see that I've shifted the whole major-chord sample down by 5 semitones, to make it a G major chord. Now, when I play it back alongside the un-shifted version (C major), it sounds like this:
It sounds nice, don't you think' The notes of both chords are now stacked on top of each other, giving us G, B, C, D, E, G in ascending order. In the key of C major, this array of notes makes a Major 9th chord, which as you can hear, has a richer and more inviting quality.
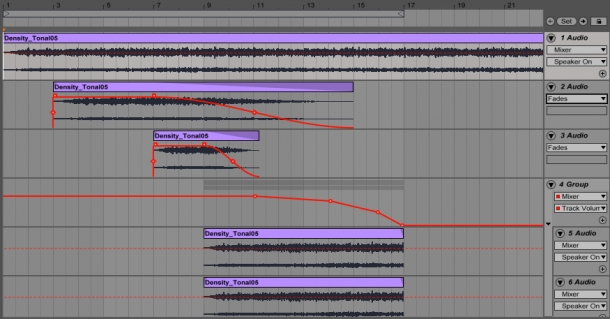
If I fade in the shifted version behind the original version, I've got the beginnings of a chord progression:
Now, I'm going to duplicate the clip again and shift it up by 5 semitones to make a IV chord, in this case, F major. If I bring in this layer over the other two, I've got the start of a melodic voicing in the mix:
Things are already sounding nice - and all we've done is taken a nice sample and applied some basic music theory to it across three versions! Let's see where else we can take things.
Discordant Sample Layers
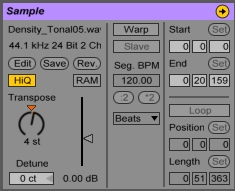
If your music theory is a little more advanced, you will hear that the new F major layer I added implies moving down a semitone to return to the C major tonality by accentuating the note E. The note C is loudest in my sample so to turn it into an E, I need to pitch-shift it up by 4 semitones. Remember, pitch-shifting up by either 5 or 7 semitones keeps a pitch-shifted chord in key, but other amounts do not. So by shifting up by 4 semitones, I now have the notes E, G#, B. That G# clashes with the C major tonality of my original layer, which we want to avoid!
Horrendous! I want to keep the E note but get rid of the rest. This is where we need to dial in a spot of music production wizardry.
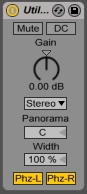
First, duplicate the offending E major track. I'm going to add a polarity reverse to only one of the two copies, by using the 'Utility' audio effect in Ableton Live, as shown above. In other DAWs, you may be able to invert the polarity (sometimes also called 'phase') directly on the track itself. Make sure you keep the two tracks' levels exactly the same and keep the two clips lined up exactly with each other.
If you listen back now, the original E major clip and the inverted E major clip have precisely cancelled each other out, meaning the E major clips are silent at the master output. Any further changes we make to only one of the two copies, however, will be audible. For example, we could put a phaser on one and hear only the wet signal no matter what the effect mix was doing, as the dry signal will be cancelled out by the other!
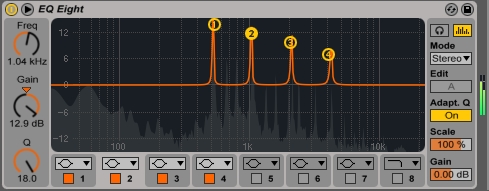
I'm going to use a precision EQ, such as Live's EQ Eight, to boost the levels of just the E note that I want, on only one of the E major clip copies. With a really high Q on each parametric bell curve, I'm going to listen in and tune the frequencies to the harmonics of the E note. You should now be hearing only the original C major clip in the background, the G major clip under it, and whatever frequency you've dialled in from the E major clip on the EQ.
The E note has a few harmonics, which you should dial in as well if you want to keep some of the note's original timbre. The E's fundamental (or strongest) frequency is 530Hz, which I arrived at by slowly sweeping my first EQ curve around the spectrum till the fundamental jumped out at me, so dial in the following harmonics at 1060Hz, 2120Hz and 4240Hz (simply integer multiples of the fundamental). Here's what the newly isolated E note sounds like:
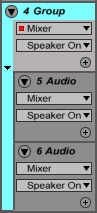
If you group the two tracks used in the E major clip together, you can adjust the volume without potentially upsetting the perfect cancelling of everything apart from our tuned EQ bands. This means that you can now fade in this E note after the high IV chord to resolve it! Fading out the layers we introduced later, we can return to the original C major chord layer, all perfectly smoothly:
I hope that the above demonstrated ideas involving pitch-shifting tonal material to the Vth or IVth scale degrees, as well as using some nifty EQ magic to expand their harmonic potential, has been useful for you. I hope you can hear how careful transposition of pitched ambience can product rich, satisfying results with only a small number of layers - maybe you're already having ideas about how you can apply these tricks in your own music.
Stay tuned to ModeAudio Magazine for future tutorials in just this sound design area, where I'll explore further ways to use the polarity-inversion trick for new and exciting results. In the meantime, get creating!


