
The arpeggio is a stone-cold classic device of the composer's toolkit, appearing time after time in pieces ranging from the classical world right through to modern pop and beyond. Indeed, it is one of the very foundational building blocks of Western music itself, hence why it's often one of the first pieces of theory a budding musician will pick up.
You don't need to think about an arpeggio, they just tend to work in virtually any musical context you care to try them in - none more so than in the revivalist music of contemporary Synthwave artists. It's also precisely why our Synthwave preset and loop packs are just packed full of them!

Today, in celebration of all things arp-centric (and because I just watched all of Stranger Things in one sitting, becoming completely obsessed with its soundtrack overnight), I want to show you just how powerful the humble arpeggio can be, using just a single melodic pattern and a little simple music theory to build up a slice of soundtrack-inspired Synthwave. Here's the finished track so you have an idea of where we're headed:
I'm going to use Logic Pro X's new Retro synth for this tutorial but it goes without saying that you can try the techniques out with any synth and DAW combination you like - you'll be able to download the MIDI and template project used at the end of the article to get you started in a flash. If you enjoy the following you should also check out my breakdown of Stranger Thing's title music, but for now, let's get arpy!
1. In The Beginning...
Just so we're all on the same page, an arpeggio is simply a sequence of notes taken from a particular musical scale, say C major, played one after the other. Typically they follow distinct chord patterns, such as a major triad (that's the first, major third and fifth note of the given scale), repeating the sequence many times so the pattern becomes quickly familiar.
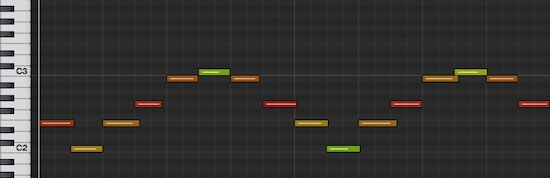
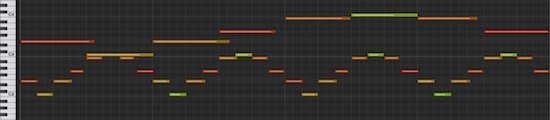
So, an easy and effective way to build up an arpeggio is to choose a chord you like the sound of and then determine how you want the pattern to move - upwards, downwards or back and forth (those buttons in the arp section of your synth are beginning to make sense now huh'!). I'm going to choose a major 7th chord for just a little flavour (containing 1st, maj3rd, 5th, maj7th and upper octave notes), in the key of C to keep things simple.

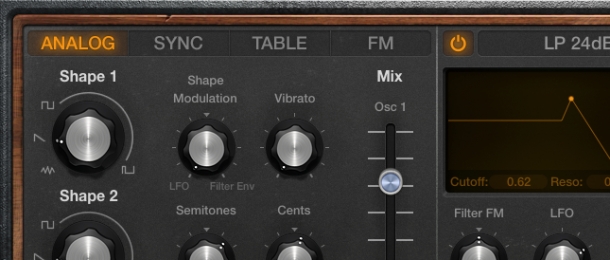
I've created a new soft synth track in Logic X, dialled up the Retro synth and played the notes in using my MIDI keyboard, choosing the back and forth, or up and down, arpeggio pattern because I love all things symmetrical. Here's how it sounds:
I've dropped Retro Synth's second oscillator by 12 semitones for some added weight, applied the filter envelope and some resonance for a little punch, as well as a touch of flange, vibrato and detuning for character. A little bit of further processing using Logic's native plugins, including chorus and reverb, gives us this:
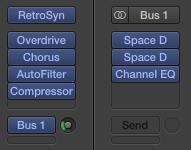
As you can see on my reverb bus channel, I've stacked the reverbs for a more complex character but you can keep things simpler if you wish! I reckon this is a good starting block to build from, so let's move onto the next voice.
2. A Little Flutter
I see this arp riff as my middle voice, so let's fill out the top-end next. Now, here comes the little bit of music theory I promised earlier - the process of using the same melodic sequence of notes but reducing their note lengths (i.e. playing it much more quickly) is called 'diminution' and it works a treat for arps!
Using MIDI makes diminution beyond easy to achieve - you just need to go into your MIDI editor and shorten the note lengths, moving them into their new positions to the left so they play back faster. Logic Pro makes this even easier still - simply select you MIDI block in the arrange window, hold the 'alt' key and hover at the block's right-hand edge, where you'll see the symbol change, then just click and drag.

I've copied the Retro Synth to a new track and shortened my original arp pattern not just by half but by a quarter (i.e. the full MIDI block, which was once 4 bars long, is now just 1 bar in length), as well as moving all the notes up the octave. This will give me a nice, fast, high-pitched part to complement my main synth riff.
Here's how it sounds:
I want this line to sound much lighter, fluffier and ethereal than this however, so I can decrease the attack time, increase the release, reduce the amount of filter enveloping and ramp up the reverb to give me this:
Apply a little bit of mixing and here's how they sound together:
Now we're getting somewhere!
3. Laying The Foundation
Next on the menu now we've filled out the top-end is, of course, beefing up the low-end. Again, I've copied the Retro Synth to a new track but this time I'm going to trigger it with some simple, constant root notes to really give the song that classic, driving Synthwave feel:

Now we're really cooking! I want to beef up the sound to give it a bit more power, so I've added some compression alongside output distortion using Logic's native compressor plugin, as this saturates the signal for extra warmth. I'm reducing the signal by about 5dB and putting this back in with gain compensation, but adjusting the settings to make sure the compressor is busy and constantly returning to 0, so we can really hear the thickening effect taking place.

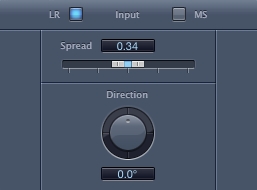
In order to make these 3 lines sit better together in the mix, I'm going to use Logic's direction mixer plugin to pull the bass towards the centre at about 34% of full stereo width, as well as reducing the main arp line's width to 70%. This leaves the extremities of the field for the higher parts. Here's how this all sounds:
So far so synthy! Now to put the icing on the cake...
4. Colour In The Background
With our higher synth arp, we used diminution to squash the melody down into a much quicker, almost trill-like pattern - now I want to introduce you to the opposite process, know as 'augmentation'. This time, I want to copy my original synth track and drag out the MIDI block so it's double the length, stretching out the arpeggio so it takes a full 4 bars to get back to the original note. Here's how this sounds:
I actually want to use this voice as a gentle pad sound, filling out the background of my Synthwave track. Increasing both attack and release times, reducing the low pass filter cut-off, setting Retro Synth's 2nd oscillator 7 semitones above the first and pushing the whole arp line up the octave gives me this:
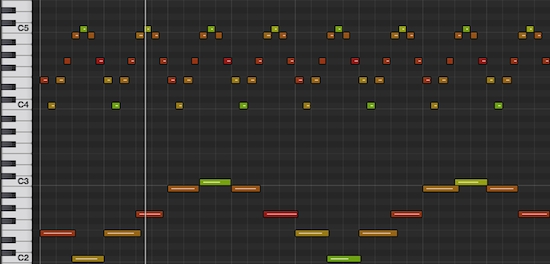
Put it all together and we arrive at our finished Synthwave score:
5. In The End...
There you have it - a single arp line, a little bit of music theory and a very capable soft synth are all you need to get cooking up some steamy Synthwave in a jiffy. You can pick up plenty of arp synth presets, MIDI loops and more in our sound pack catalogue, as well as drum samples to get your retro beats off the ground in seconds - until next time, get creative!
Grab a free download of the Logic Pro X project, MIDI files and final rendered audio track using the button below.


