
It will come as no surprise to you that here at ModeAudio, we’re massive fans of Stranger Things. Having grown up on the best of 80s film and TV, the series struck a nostalgic chord deep within me that has now resonated within millions around the world.
But beyond the immediate appeal of a plot replete with shady government experiments, psychokinesis, scary monsters and good, old-fashioned adventure, there was that absorbing music - it soothed us in quieter moments, as well as sending shivers down our spines as we geared up for the next battle.
Composed by Kyle Dixon and Michael Stein of Synthwave band S U R V I V E, the score of Stranger Things is a thoughtful mix of analog synth lines, subtle drum machine pulses and shards of noise, sculpted to evoke the soundtracks of John Carpenter and others, yet moving into a deft, supple territory all its own.
Today’s Lesson
In homage to what I happily refer to as a landmark of soundtrack music, today I want to take you through the show’s captivating intro credit cue, in the hope that we might all come away with a few tips and tricks that we can use in our own scores and music in general.
To do so, I’ll need to use a DAW and to make things simple, I’m going to restrict myself to using a single synth in creating my version of the Stranger Things intro music. I’ve chosen Logic Pro and its extremely straight-forward but wonderfully versatile Retro Synth, adept as it is at conjuring up those analog-style synth vibes. Let’s get started!
1. Arp Attack
Now, it might not seem like it but there’s actually a hell of a lot going on in this opening title music - it’s to the extreme credit of Dixon and Stein that they’ve managed to mix a large amount of subtly sculpted material with such care and precision, as well as fitting it into one barely minute-long cue.
To begin, I’m going to cook up the element that’s probably most associated with vintage film soundtracks and early analog synth work at large - the arp.
Stranger Things’ central arp riff is a simple repeating C major 7 broken chord, which the composers carefully low pass filter throughout to build and dispel tension. It’s the oldest trick in the book by boy is it effective!
What is interesting about the composers choosing this chord is that the cue is really in E minor - this is why when the bass resolves to this note we have a sense of coming to something of a close. The contrast between the major arp figure and the minor tonality of the cue overall, is the central source of tension in the piece.
Here’s my repeating MIDI pattern, and the sound I’ve dialled up within Retro Synth:
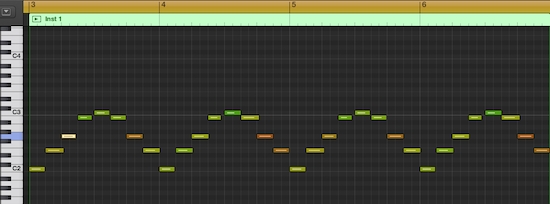
The key to this sound is the separation between Retro Synth’s two voices by an octave - it allows the riff to act as both a lead melodic riff and a bassline, depending on how it’s filtered.
Here's how the arp riff sounds:
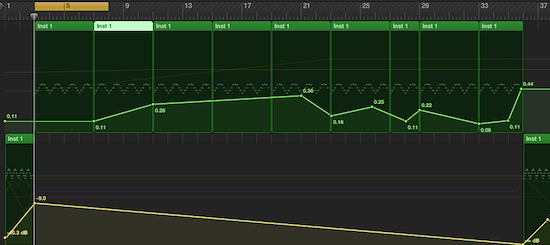
This central arp starts off with a low cut-off, which is gradually ramped up as the cue progresses - cleverly though, Dixon and Stein pull the cut-off back towards the end of the cue, all but removing the arp from the mix. This gives them the spectral space to suddenly leap the arp back into action for the very end of the cue, which brings a sense of closure to this short piece of music.
Here’s how I’ve plotted out my filter cut-off automation through the track:
Now, if you play just this arp and listen back closely to the Stranger Things cue, you’ll notice there’s something in the bass register that’s missing. It’s really hard to make out from the cue as it’s an incredibly subtle piece of sound design, but I feel I’ve gotten fairly close with this simple ostinato riff:
It doesn’t sound like much but when you pair it with the central arp you can hear what I mean:
2. Big Kicks
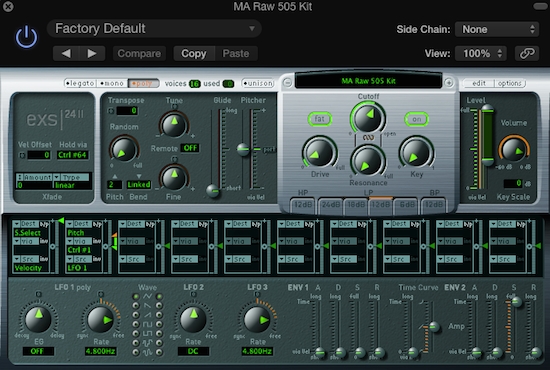
Another of the cue’s most integral features is its heartbeat-like kick drum pattern - as we’re in Synthwave/retro/80s soundtrack territory, I’m going to guess this is a low-pass filtered drum machine kick, so I’ll take a sample from our Beat - Drum Machine Samples release, which features samples of some classic, vintage hardware, to use here.
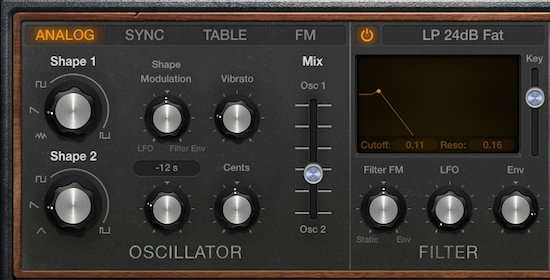
Loading up the ‘Raw 505’ kit from this pack within Logic Pro’s EXS24 sampler, I can use the sampler’s onboard filter to tweak the sound to my liking:
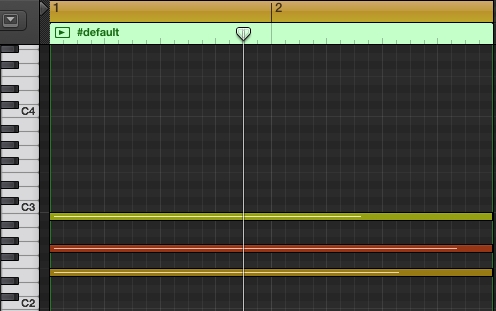
Now for the MIDI to trigger the sound - it’s a very simple two note repeating pattern, occurring every minim if we’re working at 168 Bpm or every crotchet if we’re in half-time at 84. Here’s how this sounds with our arp figure:
3. Bigger Bass
Onto the next most important figure of the cue - the bassline. The bassline featured in this title music is epic - huge, weighty analog synth notes that anchor the rest of the music and provide the basis for the harmonic structure of the score.
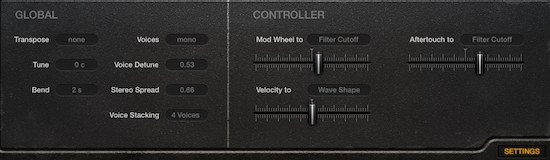
Again turning to Retro Synth, I’ll detune my two oscillators by 6 seconds, ramp up the voice stacking, increase the voice detune and spread out the sound in the stereo field - this will all have the effect of beefing up the sound and giving it that monolithic feel.
Setting your amp and filter envelope settings just right doesn’t hurt either - here’s how my bass sounds on its own:
We now have the most important elements of the cue setup and ready for arranging. On top of this, the music features a fair number of much briefer elements such as synth chord stabs and subtle SFX, helping to colour the score and drive it towards its conclusion - I won’t cover all of these things as this tutorial will quickly turn into an essay! However, I’ll tackle the most important of them now.
4. Synth Chord City
Synth chords are largely used by Dixon and Stein to propel the cue onwards into the next mini-section, such as at the very beginning. Momentum and tension are everything when it comes to soundtracking film, so having tools to manipulate these elements are absolutely essential!
So at the very start of the cue, we have an E minor chord (remember, this is really our key or ‘tonic’) played by a wavering synth - it’s also low-pass filtered, with the cut-off ramped up over the course of 2 bars to lead us into the beginning of the kick notes and arp figure.

To recreate this wavering nature, we can take advantage of Retro Synth’s vibrato controls - I’ve set my rate to 1.5Hz (pretty slow, in other words) and the amount to 0.68. This is enough to give us that classic, woozy feel:
E minor synth chords feature in much subtler guises throughout the rest of this intro music, so unfortunately it’s outwith the scope of this tutorial to cover them all here.
5. Twinkle Twinkle
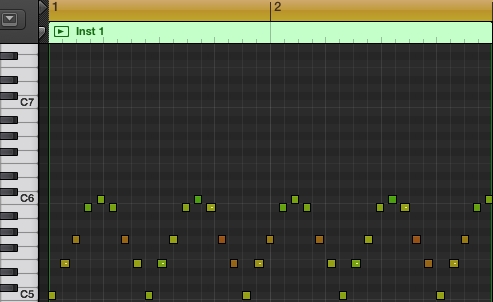
It should come as no surprise that this cue features a second arp riff - it’s the same broken chord as the main riff, only 3 octaves up the scale and played twice as quickly. This is the twinkly riff you here at the very beginning, and then at the very end of the music.
In fact, the riff is played very slightly faster than a simple doubling of the main riff’s note lengths - I’m not sure as to the exact nature of this part, but again I feel I’ve come pretty close by making 8 beats fit into 6:
Retro Synth can again be manipulated to recreate the heavy use of filter resonance you can hear in Dixon and Stein’s music - this time however, we’re high-pass filtering the arp, automating the cut-off up and down the frequency scale to give the riff movement and energy:

Here’s how this sounds with our intro pad beneath:
6. A Sense Of Place
Now we’ve covered all the main elements of the cue, one of our last jobs in terms of getting the overall sound right is to add some reverb. I’m using Logic Pro’s Space Designer unit, loaded with the appropriately named ‘Vintage Gear Hall’ impulse response to give my cue some atmosphere.
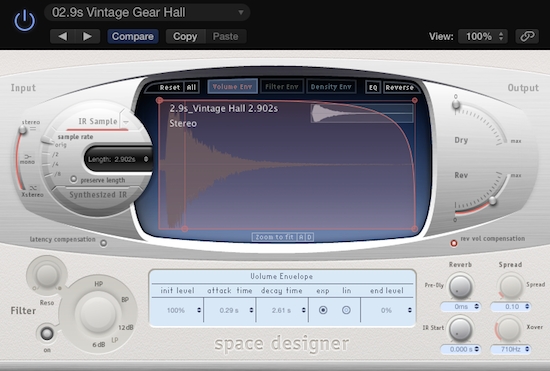
The main arp riff is totally dry as far as I can tell, as is the kick pattern - so, I’ll use Logic Pro’s bus and send capability to send varying amounts of my other synth elements to this reverb unit. This will also help to glue all these disparate sonic figures together.
7. Use Your Ingredients In The Right Order
Finally, we need to arrange out our MIDI, as well as setup quite an extensive network of automation curves! The cue mainly focuses on filter cut-off automation, but I’m also adding in some volume curves as well as subtler amplitude envelope tweaks.
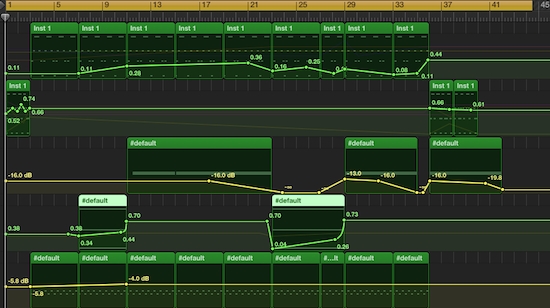
This all helps to give the cue some life, as well as giving us greater control over those all-important elements of tension and momentum.
Again, I’m afraid it’s outwith the scope of the present discussion to go into all the automation tweaks I added here - let careful listening to the original cue be your guide, but the most integral takeaway is to set filter cut-offs low and them bring them up when you’re headed towards a central moment of your track, as well as bringing them down again to subtly take elements out of your mix.
8. The End Of The Beginning
Now I’ve setup all my automation and arranged out my MIDI, here is my final Stranger Things imitation cue:
It’s not perfect, but I think it does a good job of capturing the core elements of that intriguing intro music, that never fails to set my pulse racing!
I hope you’ve been able to take something away from the above discussion to try out in your own music, you can also download some of the MIDI I used, as well as the drum sample and some bonus loops from our brand new Synthwave Bundle, for free below.
I hope they help to kick-start your next soundtrack-inspired gem - until next time, get creative!


