

The analog sound is much sought after and for good reason - warmth, subtle saturation and crunch were the order of the day in yesteryear's vintage studios. By the same token, the convenience, flexibility and versatility of today's digital synths and tools cannot be overstated.
Given that the two are often presented as incompatible opposites, it seems we have something of a production perplexity on our hands!
Luckily for us, there are a growing number of plugins and devices that can help us to simmer, bake and burn those hard-edged soft synths and VSTs into something altogether more snug and inviting and, when combined with the tips I'm about to share with you, this can be very quick and easy effect to achieve indeed!
1. Watch Those Wiggles: Careful EQing
Whenever you're thinking about dealing with the basic sonic 'colour' of a sound, as we are when attempting to warm sounds up, the first tool that should spring to mind is EQ.
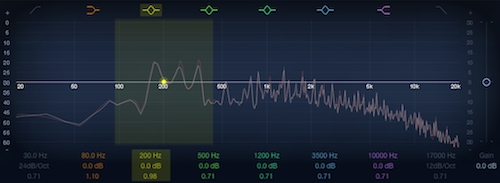
As a starting point, it's useful to think of the spectrum of your sound as being split into 4 basic bands, as you might find on an old hi-fi amp: low, low-mid, high-mid and high. When it comes to warmth, the band we need to focus on is the low-mid - somewhere in the region between 200 and 500 Hz.
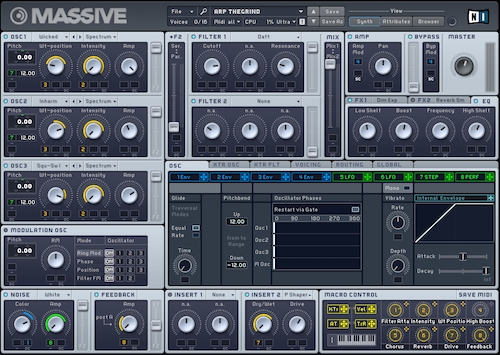
To demonstrate, let's dial up an arp synth line powered by a notoriously 'digital' sounding soft synth: NI's Massive:
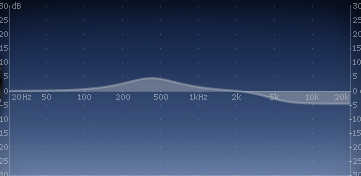
A fairly basic, square wave-based sound to be sure; so how can we warm things up' By taking a notch filter from my DAW's native EQ plugin, I can sweep a deliberately accentuated amplitude boost of 6dB from 500 down to 200Hz - I find that 310Hz sounds the warmest in a smooth rather than a bloated, lumpy way for this sound.
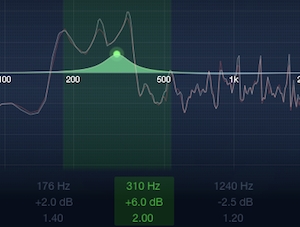
Dialling back the notch to a 3dB boost and adding a second, subtler boost of 2dB at just below 200Hz, I can now think about the flip-side of any EQ work - attenuation, or cutting.
Cutting can be every bit as powerful as boosting and is often overlooked by beginner producers. By subtly removing energy from a given frequency region you begin to shift attention to other areas, thus boosting them in the perception of the listener.
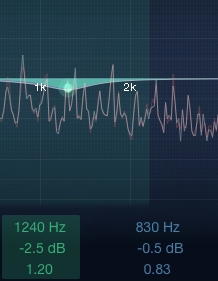
So, to my ears the arp synth line sounds a little harsh and bright - I can test this by taking a deliberately accentuated amplitude cut of 6bB and sweep around the high-mid range of 1kHz, which I often think of as being the 'nasal' region of the spectrum. Indeed, a cut of around 2dB at 1.2kHz does the trick, which alongside a subtler 2dB high shelf cut from 8kHz produces the following effect:
Not bad for a little careful EQ work, huh'!
2. Push It To The Limit: Saturation Plugins
One of the most coveted features of analog mixing desks is the ability to push signals beyond 0dB, which when driven through the right hardware can produce a warm, subtly distorted effect by introducing upper harmonics into the spectrum.
Doing the same through digital components results in harsh clipping, which is why it's often advised to work well within the 0dB limit when mixing tracks in your DAW.
Thankfully however, there are tools out there that recreate this gorgeously crunchy saturation with great accuracy and one of the best is even free to download - enter Softube's fantastic Saturation Knob!
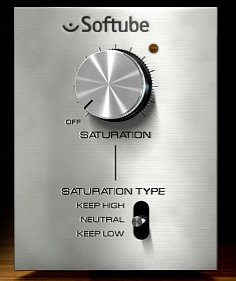
This plugin can produce a sound from subtle saturation to all-out fuzz but seeing as we're strictly talking saturation here, we'll only give the knob a little twist to colour our demo sound. Here's a electro piano riff created using Logic's E-Piano synth:
Now let's dial in some soft saturation:
It just does the business, no questions asked! There's just a little (deliberate) hint of going into the red here and there, which is actually the plugin adding grit to the signal. There are other great saturation plugins out there, such as Sound Toys' much-celebrated Decapitator, so don't feel limited to a single device.
3. Spaces Speak: Using Convolution Reverb
A more unusual trick for dialling up the warmth in the digital domain is to turn to the one reverb unit to rule them all: convolution. This kind of reverb uses digital algorithms to blend the sonic characteristics of real world spaces, known as impulse responses, with whatever signal you feed into it - in our case, a digital synth sound.
To fit our specific brief here though, we'll need an impulse response that sounds nice and warm, as this is going to need to bring the low-mid energy our synth line is lacking. As I don't particularly want to hear the reverb as a separate entity from my synth, something with a short decay will work nicely - think plate and spring reverb responses in this case.
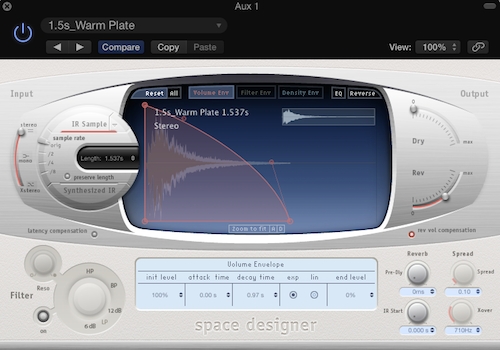
I'm going to use Logic Pro X's excellent Space Designer plugin as a send effect, alongside its handy preset impulse responses, to find something nice and warm to run my synth through - I've opted for one simply but rather invitingly titled 'Warm Plate'. If you don't have Logic however, there are many free convolution reverb units available out there, such as SIR Audio Tools' SIR1.
Here's another arp synth line before adding reverb:
Now here it is with my warm plate verb applied:
This also adds some stereo width to my sound, which is a welcome addition in this case.
Space Designer also boasts a handy EQ feature, allowing me to dial in a subtle boost at 360Hz to really ramp up the warm effect - again if you aren't using Logic, you can always use a separate EQ plugin after the reverb unit to add in some extra low mid gain.
4. Take The Bus: Adding Processed Layers
The next tip I want to show you today is perhaps the most blissfully simple of them all - mix in processed layers to your original sound. I'm going to use Basic from Audio Damage to create a simple bassline, then add in a processed copy of the very same sound to beef it up. Easy right'!
Here's the bassline before we begin:
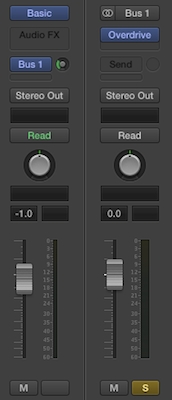
Start by sending your sound out to a separate bus and soloing it - now we can add whatever processing we want to treat the sound, then go back to our bassline track and adjust the send level to get the blending just right. Here's the bassline mixed with some overdrive:
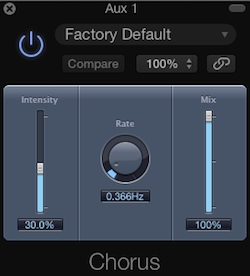
This really helps to thicken the sound, similar to the saturation tip we looked at above. Another of my favourite plugins to use with this technique is chorus, which again adds a warm, widening effect to the original bassline:
5. Turn Back Time: Adding Noise
The final trick I want to introduce you to today is almost definitely the least predictable but it can really help to subtly lift particular instruments into warmer, more analog-inspired territory: adding in a layer of noise.
Back in the analog days of course, things were simply noisier - now, don't confused this with louder, what I mean is the jacks, cables, wires and patch-bays of the vintage studio all introduced a certain amount of hiss into the signal chain, something digital sound has completely removed from the equation.
However, with this new degree of clarity and precision comes greater control - now we can do things like quietly layer in noise oscillators beneath our sounds to add a bit of retro rustle to proceedings.
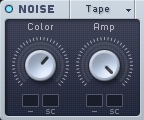
Check out my original bassline but this time with a little bit of tape noise courtesy of NI Massive mixed in for good measure:
I've low pass filtered the noise and made sure it only plays during the bass notes, so the effect is very subtle but nevertheless, I think it demonstrates how this tip can help to introduce a warmer vibe to a digital sound. If you don't have Massive, there are lots of other free noise generators available online, such as MeldaProduction's MNoiseGenerator.
Wrap 'Em Up
I hope I've shown you with the above music production tips and tricks that digital doesn't have to mean cold, calculated and stiff, and that with a bit of know-how and the right tools up your sleeve, you can heat up your sounds in very little time at all. Always, get creative and don't forget that the best way to achieve warm results is to start with warm sounds in the first place!


