
Here at ModeAudio we love sharing little production tips that help put your own unique stamp on your music.
Carrying on our recent love affair with Vital, and alongside our latest release Microchip - Vital Synthwave Presets, today we're going to look at how we can use this nifty soft synth for one of the integral sounds of the drum kit: the hi hat.
Instead of reaching for the classic hi hat sounds of the 808 and 909 drum machines, why not find new ways to create hi hats we can truly call our own?
In this tutorial, we'll explore how we can combine texture samples or field recordings with the Vital synth to get innovative with our hi hats.
We're going to try and make use of the subtle modulation throughout a long texture sample to create a hi hat sound that does the same.
Let's dive in!
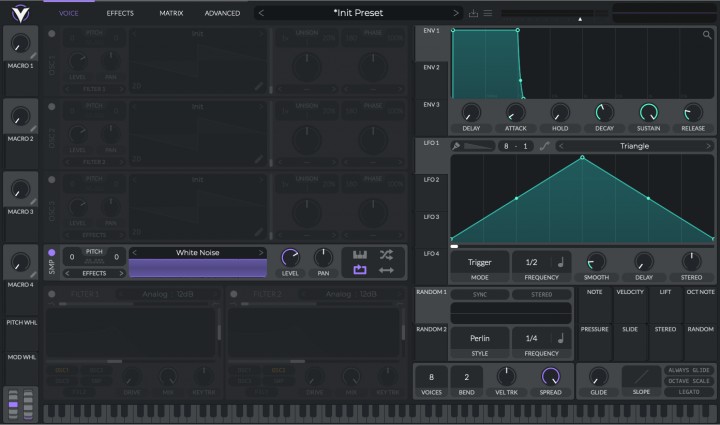
The first thing I want to do after loading Vital onto a MIDI track, is to disable OSC1 and enable SMP - This is the sampler that is built into Vital and is similar to the 'Noise' function of the Serum synth.
Next, I want to locate a nice, long textural sample to load into the sampler. This will form the basis of my hi hat sound, so ideally i'm looking for something with plenty of high frequency content.
I've found a nice sample in one of our latest Ambient releases, Gradient - Guitar Texture Samples, that I think will fit the bill:

Once I've loaded the sample, I make sure to activate the top 2 icons in the right panel - pitch and random phase.
This means I can play the sample back at a much higher pitch if need be, to help give it more of the hi hat quality, and allow for variations in sound. The random phase setting also means the main sample is triggered from a different starting point each time - ideal for maximising modulations in character!
Notice that I've also brought the 'Level' right down:
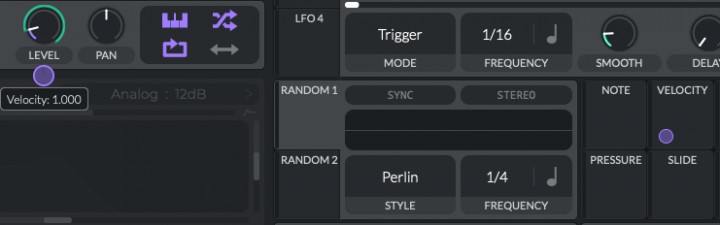
This is so that I can have the key velocity manipulate the sample level. I simply click and drag the 'Velocity' section to the level control of the sampler, and adjust the amount to maximum.
Now, when I trigger the sample with my MIDI controller, I'll get a louder sound with a harder hit.
I also want the key velocity to modulate the pitch of my hi hat slightly, as well as the volume:
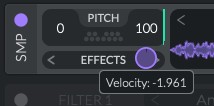
As you can see here, I've adjusted the tuning of the sample, connected the 'Velocity' modulation source to it, and set the amount to a negative value.
This means that lighter key/pad presses on my MIDI controller will give higher pitched sounds, and more forceful triggers will give a slightly lower pitch.
If I wanted the velocity to have a more drastic affect on the pitch, I could connect the modulation to sample 'Transpose' (on the left), as opposed to sample 'Tuning'.
The final parameter I'll connect to the velocity will be the amp envelope release:
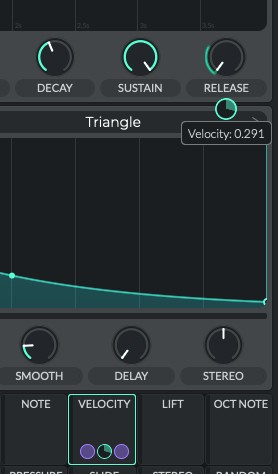
I've set the amount relatively small to keep the effect subtle but noticeable. Now when a note is hit harder, the sound is louder, deeper and longer.
My hi hat is starting to take shape!
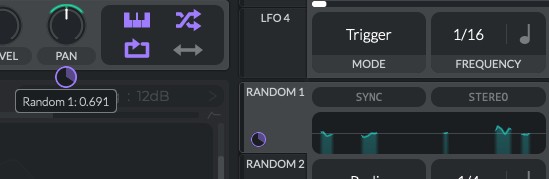
Before I head to the 'Effects' panel, I'll make use of Vital's 'Random' modulators and connect one to my hi hat's pan. This will add some nice, subtle movement in the stereo field of my sample during playback:
The next step is to configure the FX to do some shaping and finessing of our sound:
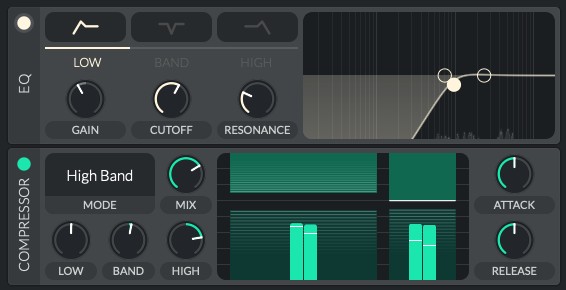
First, I enable the EQ in the FX chain and apply a high-pass filter. I adjust the cutoff while playing back the sound with my MIDI controller, until I get the crispness I want.
I've then added the Compressor to the chain, really just to lift the overall gain.
At this stage, I could also add some of Vital's distortion FX if I want an extra bit of 'fizz' in my sound:
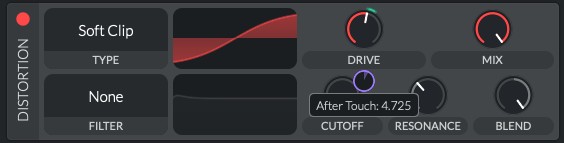
This time i've also connected the 'After Touch' or key 'pressure' to give the distortion a touch of drive when I play with that extra force.
I may also want to dial in a little bit of reverb too at this stage, unless I'd prefer to leave that for my drum bus processing chain.
Now it's time to start playing some hi hat patterns in!
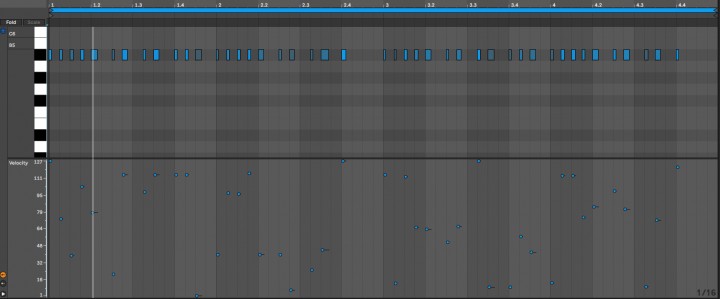
Notice the variety of velocity values that I've created with each note - this should help to give each 'hit' of the hi hat a unique feel, as would be the case using a stick on a real hi hat.
Let's have a listen:
Sounds like we have a truly unique sounding hi hat!
And remember, not only do we have the subtle changes in pitch, length and loudness that are linked to the different note velocities, but there is also the modulation inherent in the original texture sample that comes into play with every note too.
Let's add some more drums from Foundation - Drum Machine Samples and some synth loops from Multiverse - Retrowave Loops into the mix and see how our hi hats sound in context:
Not bad!
I hope you're now inspired to develop your own hi hat sounds in Vital, or a similar synth.
Make sure to dive into some of our recent Ambient packs for some delicious texture samples you can use as a basis for you hi hat.
Don't forget to also check out our ever growing collection of preset packs for Vital. Watch this space for more to follow in the future.
Get creative and let us know how it works for you!


