
When I was first getting into music production, one of the things that I just couldn't seem to achieve was the full, thick sound that I could hear in a lot of my favourite music. Even in tracks consisting of very few parts, there was this deep, full sound that try as I might, I simply couldn't create in my own tracks.
From browsing countless forums and Q&A sections of various music tech magazines, I knew I wasn't the only one hitting my head against a brick wall - in fact, it seems clear to most that a rich and full mix is something that pretty neatly separates the beginners from the pros.
As with many things in life, practice makes perfect but for me, there were undoubtedly a few pivotal moments of epiphany en route to achieving a full, thick sound - I want to share the best of these tips with you here, so that you too can pull back the curtain and get your beats rolling deeper than ever before!
1. EQ With Care
The first area I want to drawn your attention to in Big Beat Bootcamp, is EQ. We are often told, with great reason, to listen out for clashing frequencies across the different parts of our productions, that carving out distinct spectral areas for each instrument is the best route to mix clarity and balance.
Whilst this is undoubtedly true and is an approach I would whole-heartedly encourage, I want to stress that you should be sure that what you are cutting is actually clashing with something else in the first place!
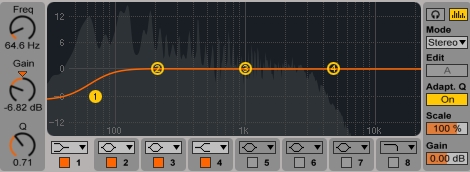
With regard to mix weight, this advice is most pertinent to the low end of the frequency spectrum. For example, it is almost second-nature to me now to roll-off the lows of synth riffs and guitars to make sure there's plenty of space for my bass and kick parts - I find myself pulling up an EQ and cutting away almost automatically.
This might be an entirely legitimate action to take but my point is that careful listening should be done first, to make sure it is really necessary. The worst outcome in this case is that the lows of my synths and guitars aren't really clashing with anything else in the mix, and all that I'm really doing is making these parts sound a little weaker and, you guessed it, thinner.
One of my all-time production heroes is Four Tet and I've called on his advice a number of times in the pages of this magazine. An important lesson I took from him comes readily to mind here once again - in an excellent Production Masterclass video he made with Future Music, he revealed that the secret to the rich, full mixes he continually creates in his music, is that he doesn't do anything to them!
To clarify, he explains in the video that he does very little EQing to the parts of his music, allowing the complete spectrum of each part to contribute to the fullness of the track's overall sound. So, next time you pull up an EQ in your production, be careful how you use it!
2. Compression: Easy Over-Does It
The next area I want to tackle in our journey towards producing thicker mixes is probably the most obvious - compression. Levelling out dynamic shifts in a sound to produce a more solid, full result is the staple use of a compressor, so it's an important tool to use in the present context.
Beyond simply ensuring that your sound doesn't dip away beneath a perceivable threshold to become masked by the other parts of your track, compression can also be used to really push a sound to the forefront of your mix.
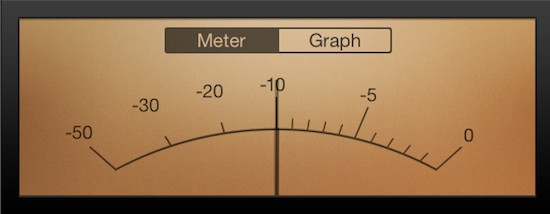
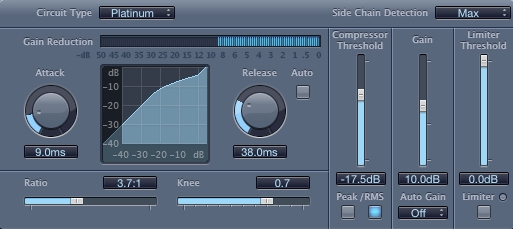
For a part that you feel lacks body and weight, try using drastically exaggerated settings to really beef up the sound - you'll need to pay particular attention to the relationship between the threshold, ratio, make-up gain and the overall level to produce the right effect.
Whereas typically you might only want to reduce the overall dynamic range by say 3 - 6dB, try reducing the peaks in your sound by 10dB, allowing you to raise the lowest levels in the sound by the same figure. We could term this technique 'over-compression' and it can certainly produce some big results!
You'd be surprised at the difference between a sound with a relatively high peak level and the same sound with a lower peak volume but with over-compression applied. In fact, this is a really good experiment to conduct yourself to really hear the difference it can produce - do a side-by-side track comparison, or AB test, to feel the true power of this technique.
3. Compression: Parallel Universe
A second compression technique that is incredibly useful to this end is parallel, or New York-style compression. This is a celebrated technique covered in countless tutorials and magazines so I'll only briefly outline its operation here but it's safe to say that this can be a massive influence over the relative fullness of a production, particularly with regard to drums.
The typical use of compression, which is to make the loudest parts of a signal quieter, is referred to as 'downwards' compression but, logically enough, the reverse situation also exists.
An 'upwards' compressor would analyse the level of an incoming sound and if it drops below a certain level, boost it with make-up gain. This type of compression is very difficult to implement in a stand-alone unit however and in any case, would result in a direct boosting of the ambient noisefloor of the sound being processed, something most producers are keen to avoid!

So, how do we achieve the results of upwards compression with a regular downwards compressor plugin? Easy, with a second compressor! The idea here is to make a copy of your signal, compress it very heavily and mix this back in with the original signal.
What happens is the loud parts in the copied signal are greatly reduced with the quieter parts left untouched, meaning when this signal is mixed back in with the original, you are effectively boosting the quietest parts of your sound without touching the loudest. Clever huh?!
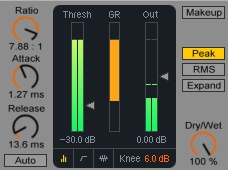
As I said above, parallel compression works wonders on drum tracks. Bus out your drums to a separate channel, heavily compress the signal as much as you dare (-20dB of gain reduction is not necessarily a bad thing here!) and mix it back in with the original - instant music production gratification! However, this technique can also work just as well for instrumental parts, so give it a try on anything you feel is lacking a little weight and body in your mix.
4. Layering: Multi-Colour Sounds
The next area I want to cover is layering, possibly the most vital tool in the arsenal of the producer attempting to beef up their sound. I covered a handful of useful and easy-to-implement layering tricks in another article so I'll keep my discussion of them fairly brief here.
One thing you should always keep your ears open for when layering is phasing - if your layered sounds are too similar and are slightly out of phase with one another, either due to plugin latency or the nature of the sounds themselves, you'll produce that phaser-like effect that can really weaken the overall sound.
To rectify this, modify the settings of your sound or try adding a plugin with an 'invert phase' function, such as Logic's Gain plugin, to one of your layers, or add a phase-modulating effect such as chorus or a flanger.
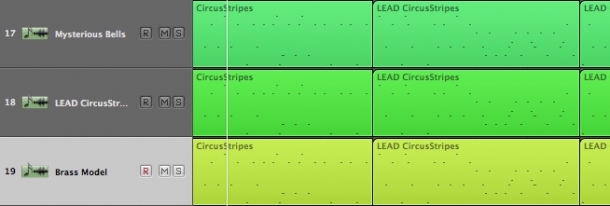
For synth parts created with MIDI, layering is a simple joy. Just duplicate your MIDI file across to a new channel with a new synth sound loaded up and get experimenting! This is one of the central reasons that all our loops and presets packs come with MIDI parts too - check them out here.
The way I like to experiment with this technique is to load up a new layer with the same MIDI pattern and slowly fade it in from nothing - if I like the gradual sonic additions to the original sound, then I'll keep the layer but if not, I'll try something new.
It can be useful to try something similar to your original sound at first, then get more and more creative to produce ever-richer and complex results.
An audio part that you want to layer up can be processed using plugins to produce a different timbre or spectral makeup to the original, which you can then experiment with mixing back in with the original in the same way as outlined above.
5. Layering: Up And Down The Octaves
Layering your original parts with octave versions can be another very fruitful technique to use here also. Synth leads often lend themselves to layers that are an octave higher and mixed subtly back in with the original, you can also try high-pass filtering the octave layer to make it less obvious that the part has been doubled. This layered part will then simply help to bolster the upper harmonics of the original sound.
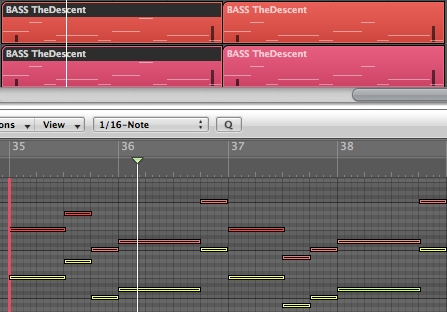
Conversely, bass sounds can often benefit from having a sine wave oscillator, dropped an octave beneath the original part, layered up. This can work wonders especially for distorted sounds that might carry most of their energy in the low to high mids, rather than the lows, lending a deep, rounded quality to the combined, layered signal.
6. Use Better Sounds
It might seem like a bit of a no-brainer, but my last tip on improving the fullness of your music is, simply enough, to use better source sounds! Whether this means working with top-quality loops and samples, such as those you can find in our royalty-free sample catalogue, or purchasing a new soft synth, make sure you're experimenting with only the finest sound around.

In Conclusion
I hope the above discussed tips and production techniques have introduced you some useful and practical tools for thickening up your mixes. Careful use of EQ, clever compression and creative layering can all be used to together or in isolation, subtly or extensively, making them all important tips to keep in mind when filling out your sound. Until next time, get creative!


