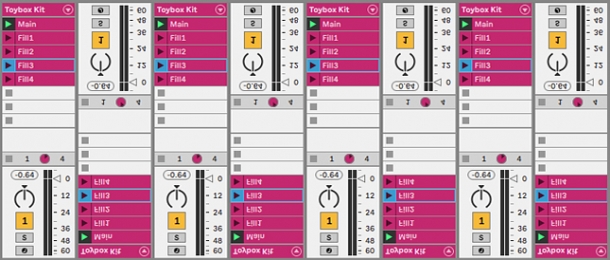
One of the best things you can do to make your beats more dynamic and interesting is to add some drum fills.
Drum fills are pretty much an essential part of any song - they serve as a way to transition between different sections of the track, building and releasing tension, and ensuring the listener isn’t bored by a monotonous, one-dimensional rhythm that never changes.
That said, placing fills in your arrangement can be a pain-staking process that eats up a lot of time. In this tutorial, we’re going to look at a cool, quick way to incorporate fills that won’t slow you down when you’re on a creative roll.
Using the Session View in Ableton Live, we’ll pre-program a selection of fills, and then automate their playback, essentially giving the effect of a live drummer playing independently. Let's get started!
Laying The Foundation
First of all, we’re going to create a simple House rhythm using some samples from our Toybox - Found Percussion Samples pack.
We’ve got a Drum Rack plugged into a MIDI track in our project, and have dragged and dropped the samples we want to use on to a few drum pads:

Making sure we’re in Session View and not Arrangement View, let’s double click in the first clip spot of the track to create the MIDI pattern for our main beat:
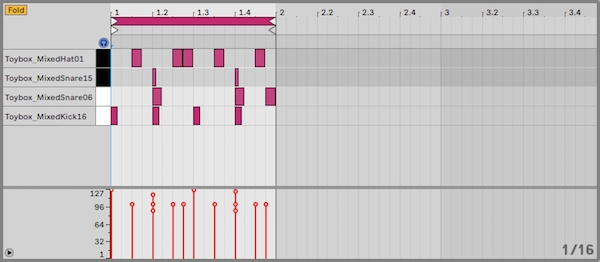
As you can see above, we’ve programmed our simple 1-bar drum pattern using the MIDI Note Editor. If we loop the beat over 4 bars, this is what we get:
A fairly solid beat I’m sure you’ll agree, but it’ll be a bit boring if this is the only thing our drums do for the whole track! So now we’re going to add a few variations - these will be our drum fills.
Filling Up The Tank
Let’s copy our beat into the 2nd clip slot by holding alt and dragging the first clip down. We’ll rename the first clip 'Main', the copy ‘Fill1’ and make some small adjustments in the MIDI Note Editor:
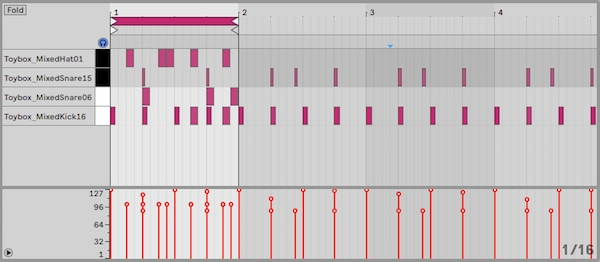
We only want our fills to play for 1 bar, so we won’t be looping them in this instance. Here’s what the resulting drum fill sounds like:
Now we’re going to repeat that process another 3 times, so we’ll end up with 4 different drum fills, each one slightly different from the other:
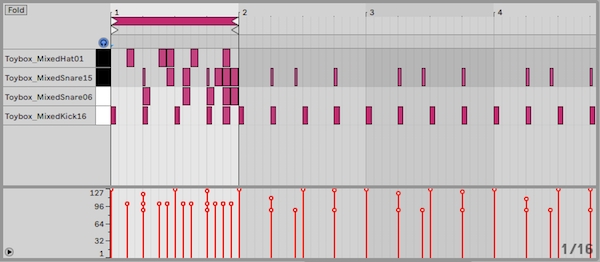
Here's how the clips stack up on our MIDI track:

...and here’s what our others fills sounds like:
Great! We can now play around with our beat in real time, triggering each clip as and when we please, to create an interesting rhythm on the fly.
Now, this is all well and good, but what if we want to free ourselves up to do other things as well. What if we want to start developing a synth part, while keeping that interesting, changing rhythm in the background? Well, we can’t just now because we keep having to manually trigger each drum fill.
Preparing The Launchpad
This is where we get into the magic of automating our beat! Basically, we want to hit play on our drum part, and have it play the fills on its own. The way we do this is by making use of Ableton’s Launch Box, which can be found in the Clip View when you click on an individual clip:
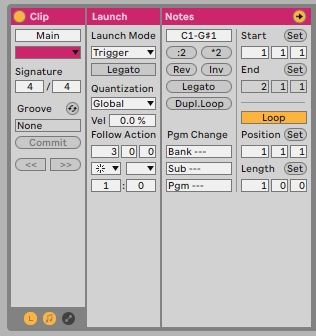
The Launch Box can be shown or hidden using the ‘L’ selector in the bottom left corner of the screenshot above. Inside the Launch Box are a variety of options, but for this tutorial we’re going to focus on the Follow Action section.
The screenshot above shows the Launch Box for our ‘Main’ beat clip, and you can see that I’ve selected 3 bars as the Follow Action Time. This means that 3 bars after the clip is launched, something will happen.
Now we need to define what that something is, and that is done in the next box down:

This box is called Follow Action A, and allows us to specify one of two possible Follow Actions for the clip (the box to the right being Follow Action B). As you can see above, I’ve selected ‘Other’ as the Follow Action for our ‘Main’ clip. This means that after 3 bars of the ‘Main’ clip, any clip other than the current one will be triggered in a random fashion.
Now we need to make sure that after a fill is triggered, the beat returns to the ‘Main’ pattern again. We do this by opening the Launch Box for each ‘Fill’ clip, setting the Follow Action Time to 1 bar, and Follow Action A to ‘First’:

Now hit Play and listen to your drum track play fills all on its own!
We’re now free to let our automated 'drummer' groove away while we start developing some other parts to our track.
Let’s add some more percussive layers to our beat, as well as some tasty licks from our Brainwave - LA Beat Loops pack to give you a sense of how it sounds in context:
So there we have it, our own personal electronic percussionist, drumming away whilst we develop synths and keys on top of the rhythm. Imagine how complex you could make your patterns with upwards of 10 fills, as well as additional percussion parts that have their own variant fills themselves?


