
Compression is, without a shadow of a doubt, one of the most fundamental aspects of mixing and, by extension, electronic music production in general. Compressors are nothing short of audio work-horses - they can be used in countless ways to solve countless mixing issues and when used in the right fashion, can totally transform the dynamic character of a piece of music for the better.
In this tutorial, I will describe compression's essential elements and will be outlining what I regard as 3 of the most important uses of the humble device in a companion compression tutorial later. I firmly believe that understanding every element of compression intimately and asking yourself the right questions whilst using it can only lead to better mixes and, ultimately, better music!
Back To Basics
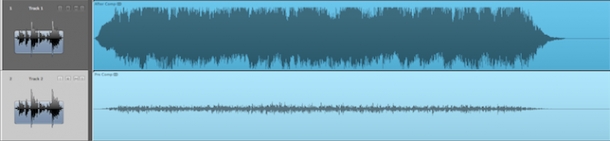
At its most basic, compression is the reduction of the total dynamic range of a given audio signal. Let's say we're working with a bass synth loop with no processing applied - the difference between the loudest and quietest moments in the loop is its dynamic range. For example, let's say our loud part is -10dB and the quiet part is -30dB, leaving us with a total dynamic range of 20dB (-10-(-30)=20).
If we add a compressor to this signal, given we've adjusted its settings appropriately, we'll begin to reduce this difference between the loudest and quietest moments of our bass loop. In other words, the actual compression part of the process attempts to reduce the maximum level the loop is reaching - let's say we've knocked off 5dB from the loud part of our bass loop, giving us a new maximum amplitude of -15dB.
Thus, our new total dynamic range is 15dB (-15-(-30)=15), giving us what can be referred to as 5dB of 'headroom' (the difference between the previous maximum amplitude and the new peak level).
Hand-in-hand with the compression or reduction part of the process is the gain makeup stage, which allows us now to push the level of the entire signal up by a uniform amount. Seeing as we have 5dB of headroom, let's say we really want to crank our bass loop and set the makeup gain to 5dB - now our quietest moment is -25dB, loudest moment is back up to -10dB and the dynamic range is still 15dB. So, the bass loop's quietest moment is now 5dB louder without pushing the loudest moment above its previous peak level - all thanks to the magic of the compressor!
Super Settings: Threshold & Ratio
Now we know exactly what a compressor does, what are the settings we have to hand to manipulate the process and tweak things to perfection' Of course, compressors come in all shapes and sizes with numerous additional features and extras but they all share the same fundamental controls - attack, release, threshold, ratio and gain makeup. We've already covered gain makeup so let's quickly get our collective heads around the other 4 settings.
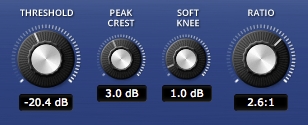
Threshold and ratio go together like butter on toast and are the most important settings on any compressor (not to discount the significance of the others!). The threshold specifies the level at which an incoming signal must go over to trigger the compressor into action, thus it is often measured in dB.
If you don't set the threshold correctly, your compressor may never trigger and thus do absolutely nothing to the signal it has been applied to! Let's consider our previous bass loop example - our maximum level before compression was added was -10dB, so our threshold would have to be set to lower than this value for it to begin to affect the sound.
The ratio determines how much compression is applied to the loud parts of the signal that exceed the threshold value. It is specified as a ratio of the amount of signal coming into the compressor versus how much is allowed to leave - so for example, a ratio of 2:1 will only allow 1dB of signal through for every 2dB that exceed the threshold level.
Returning to our example, let's say our threshold is set to -20dB and ratio 2:1 - remember that the bass loop's maximum amplitude was -10dB in the beginning, meaning at its loudest, there will be a full 10dB of signal that is exceeding our compressor's threshold (-10-(-20)=10). So, our ratio setting ensures that for every 2dB of signal exceeding the threshold, only 1dB gets out - thus, 10dB of input above the threshold produces only 5dB of output (10x(1/2)), reducing the maximum amplitude level of our bass synth by 5dB!
Super Settings: Attack & Release
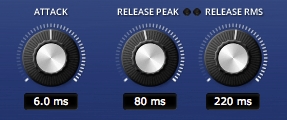
We've got to grips with threshold and ratio, so now let's briefly look at attack and release.You can think of compression as effectively applying an amplitude envelope or ADSR (well, technically just an ASR) to a signal, with attack specifying how long it takes the compressor to act when it receives a signal over the threshold and release determining how long it takes to cease to process its input after the signal level falls back below the threshold.
In the ADSR analogy, the S or sustain part of the envelope is determined simply by how long the input signal stays at a level above the compressor's threshold.
Playing around with attack and release settings can really put the icing on a compressor's cake - when you're adjusting them, you'll want to think about how often your sound is triggering the compressor, setting the release accordingly, as well as those delicate transient sounds appearing at the very beginning of the attack portion of the input signal. Set your attack to be too fast and you might be muting transients that really give a drum sound that all-important punch; set attack to be too slow and you'll end up with a lumpy sound, with little portions of signal pushing out beyond your compression threshold.
So Many Compressors, So Little Time...
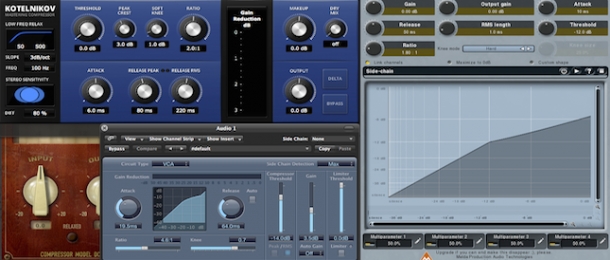
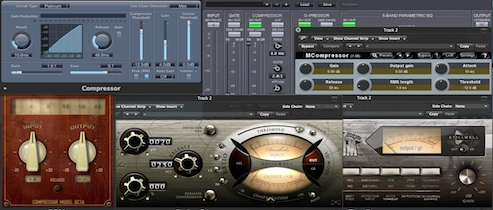
In the hardware days, compressors came in numerous shapes and forms, each using different methods of amplitude detection and gain reduction. In our new, ever-evolving digital realm of VST plugins and devices, the types of compressor you can get your hands on is even more diverse - essentially however, the majority of these compressor plugins are design to behave in accordance with a finite set of classic hardware circuits. The type of compression circuit or algorithm your plugin is using (or quite probably emulating) will affect the response of the compressor, so having a basic understand of the main types will certainly be useful when attempting to solve mixing and production problems.
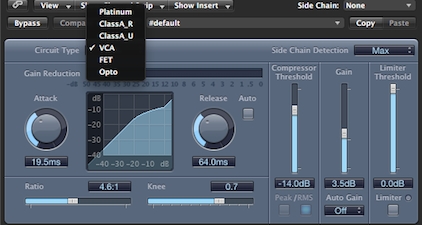
'VCA' or Voltage Controlled Amplitude compressor circuits are renowned for their fast action, particularly with regard to gain reduction. This makes this circuit especially effective for squeezing the dynamic range of transient-rich material. VCA compressors are also very reliable when used subtly on bus tracks or even the master channel, as their quick response can lend them an extra degree of transparency.
'FET' or Field Effect Transistor compressors use similar in design to VCA circuits but are known for a warmer, more coloured sound.
Hardware 'Opto' or Optical compressor circuits actually used light from a bulb to determine gain reduction and compression response. Due to relying on changes in light intensity rather than voltage, this compressor type is fairly slow to respond, which can be useful for preserving delicate transients such as those present in drum signals.
If you're very lucky, your compressor will even give you the option to select different compression circuit types to better-suit the production situation - Logic's excellent native Compressor plugin does exactly this for example, offering a choice of 6 compression types based on vintage hardware.
If you have such an option, don't be afraid to experiment to discover what works best in a given circumstance - the more you listen to and understand the results of certain circuits, the better you will be able to quickly identify the right choice for your mixes and music.
For Your Consideration
I've revealed the essential purpose of the compressor and covered the important parameters you need to know about to control its behaviour. Understanding these concepts thoroughly is key to tackling mixing issues and arriving at satisfying conclusions without wasting time.
Now we have these elements and terms in the bag, we can move onto practical applications of the compressor - be sure to also check out my concluding Compression 101: Track, Bus & Master tutorial! In the mean time, check out our other music production tips and tricks concerning compression.


