
It's time to round off my Massive drum sound design series! In Part 1, I took us through kick drum design and in Part 2 we added some snares. Now, let's fill out the top end and add some groove with synthesised hi hats. Of all the basic drum sounds, it's hi hats that have the greatest need for variation amongst the hits and so using a synth such as Massive gives us plenty of scope for adding randomised or patterned movement.

Anatomy of a Hi Hat
The eagle-eyed among you may notice that the image above is not of a 909 - it's an 808. Normally, I take you through the basics of the circuit which synthesises the classic electronic drum sounds we all know and love. The thing is, on a 909, the hi hats and cymbals are actually short samples! Stored in a tiny memory portion with 8 or so bits, the samples are crunchy renderings of a real hi hat recording. On the 808, all of the metal percussion is synthesised, so we can study the 808's circuits for synthesising our own in Massive.
There's not a whole lot of control afforded by the 808 for its hi hats - just a decay control for open hats. What's going on behind the scenes is pretty cool, though. There are 6 square waves passing through 3 high-pass filters, each filter having a slightly different envelope modulating its volume.
The square waves are tuned more or less randomly, between about 2000 Hz and 5000 Hz. This is because the components had quite low-precision tolerances, meaning that the imprecision of the manufacture of the capacitors and resistors making up each oscillator meant that the resultant frequency output was unpredictable. What this meant in practice was that every 808 had slightly different-sounding hi hats!
Programming a Basic 808 Hi Hat in Massive
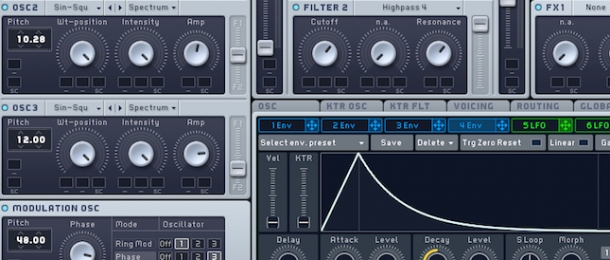
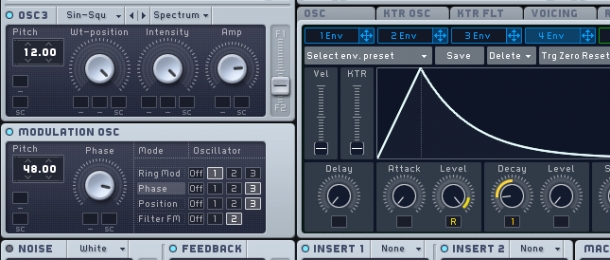
We don't have 6 oscillators available in Massive, so I'm going to need to be a bit crafty in getting all the square waves together. The easiest way to do this is to set up Massive's 3 oscillators with square waves - choose the 'Sin-Squ' wavetable in each - and route them through the modulation oscillator.
Give the mod oscillator quite a high frequency, say, +48 semitones. For Osc 1, assign and turn up the Ring Mod. This will give us 3 square waves, as ring modulation results in sidebands above and below our original frequency. For Osc 2, assign the Phase distortion. We'll get a bunch of inharmonic overtones this way, mimicking a separate, detuned square. Osc 3 can just go straight to the filters. Play around with the tunings of the oscillators and amounts of modulation until it all sounds quite bright and metallic.
Now, use the little sliders to the right of the oscillators to balance their signals between the two filters, which you need to set to Highpass 4. You can add some Filter FM to the second filter in the mod oscillator for extra grit. The filters need quite high cut-off frequencies (we don't want any bass up there in our hi hat region!), and you'll get even more metallic quality by turning up the resonance controls.
Finally, assign simple Attack-Decay envelopes to the Amp controls of each oscillator. Short attack, no sustain; decay however long you want - this will affect whether you get a closed hi hat (short) or an open one (longer). Play with the relative lengths of the envelopes for your different oscillators, and you get internal detail over the duration of the hi hat tone.
For example, give the envelope affecting your highest-pitch oscillator the shortest decay time to reflect how a real cymbal gradually becomes duller in sound as it rings out after being struck.
Varying the Beat
To inject your variation so that each hit does not sound exactly the same, assign some macros. Make some decay assignments, or some attacks, or go off-piste and blend in some white noise. A really good assignment to make - although not a macro - is the 'TrR' control to the left of the macro box.
This is 'Trigger Random', and it means every time you hit a note, you'll get a random value within the range you specify when you make the assignment. If you keep your decays short and switch them up with a little TrR range, you'll get slightly different lengths, as though the cymbal was hit slightly harder or softer every time.
If you want to see just how far you can go with drum design in Massive, take a look at our Critical Mass - Massive Drum Presets pack - there are a ton of different architectures and shapes going on in there! And of course, check out the rest of our NI Massive presets packs here.


