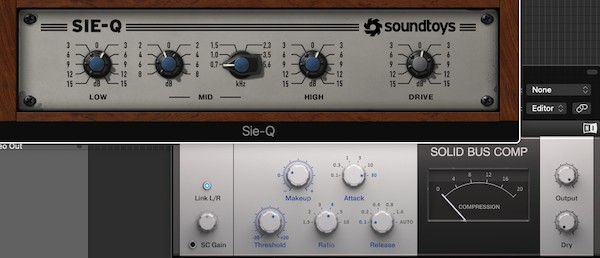
It’s time for the latest entry of my long-running Quick Tips series to see the light of day, and today we’re contemplating that most fundamental of mixing tools - the humble compressor.
Alongside EQ, compression is the backbone of any mix worth its salt, allowing producers to control the dynamic range of individual tracks, groups and the overall mix itself with just a handful of powerful controls.

Knowing exactly how and when to use your compressor is part of the art of becoming a competent producer / mixer / sound engineer, and the tip I’d like to share with you now has become something of a secret weapon in my own personal arsenal - compression stacking.
What does this mean then? Well, really it just means that rather than whacking a single compressor on your track and praying it will solve all your dynamics issues in one go (possible but unlikely!), you can use multiple compressors in your plugin / effects chain to tackle specific jobs.
A good place we can illustrate where this sort of thing might be useful is down where your drum tracks are located in your session - specifically, on your drum master bus.

Now, you might be thinking “wait a minute, I don’t have a drum master bus setup!”, in which case, you should really think about trying this out (see section 4 of my essential drum processing tips for more) as it can be the X factor in taking your drums from sounding just ok to slamming!
In a nutshell, to setup a drum master bus, simply send all your individual drum tracks through to a central stereo bus before they’re sent on to the track’s master output. This allows you to work with and process your drums as a complete unit, which is extremely useful and important from a mixing standpoint.
Back to today’s tip - when we’re thinking about taming the dynamic range of an entire set of drums running through a bus, we can usually identify a number of areas we need to address. Let’s focus on the two most obvious ones for now, to demonstrate the compression stacking concept in a simple way.

The Breakdown
Firstly, you have your transient control, wherein the very onset or attack of the drum hits, also the loudest part of the sound, is causing amplitude spikes that could adversely affect processing you might want to setup further down your plugin chain (e.g. saturation, modulation FX, reverb etc).
Secondly, we have the overall, general amplitude envelope of the drum sound as a whole, which we might want to give a lift when it’s at its quietest and reduce a touch when at its loudest.
You could think of these as micro (transient control) and macro (overall amplitude envelope) issues we need to tackle - now, a single compressor is not going to be able to handle both of these problem areas at once, hence the use of two, stacked compressors to handle each job separately.
Let’s take a more specific look at how this can work in an example DAW project, breaking the technique down into easy steps:
1. load up you first compressor at the top of your drum bus plugin chain. This is going to be for our transient control, as our overall drum amplitude envelope will smooth out the more these are tamed, leading neatly into the use of our second compressor.

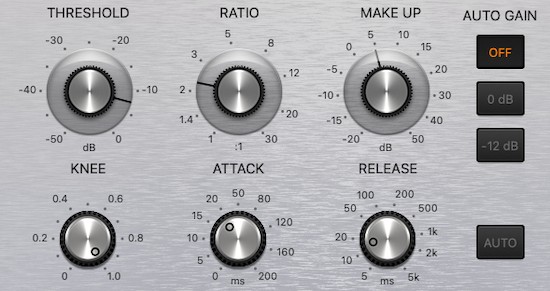
2. we’re dealing with transients here, so we need to think on a short time-scale; I tend to go for an attack of around 19ms and an even faster release of about 15ms.
You should tweak from here, but the idea is that we don’t want to affect those very first few ms of sound as this could reduce the overall punch of your drum sound, and we need the compressor to be able to act fast as the drum hits come into it, hence the quick release.
3. if possible, you should also experiment with different compressor circuits, as Logic X’s native compressor allows you to do, as they each have different characters / overall response times that will affect their ability to deal with transient control.
FET or Field Effect Transistor compressors are particularly useful for this task, though I also find Logic’s Vintage VCA circuit more than up to the task as well!
4. adjust your ratio and threshold settings so you’re only affecting the very loudest parts of your combined drum signal (likely to be your kicks and snares), watching your gain reduction meter carefully and only taking out as much gain as you feel necessary (1 - 3dB is usually enough!).

5. now we can move onto our second compressor, affecting the overall volume curve of our drums. This time, we’re thinking on a slower scale, attempting to reduce the volume more of whole sections of the drums rather than individual hits.
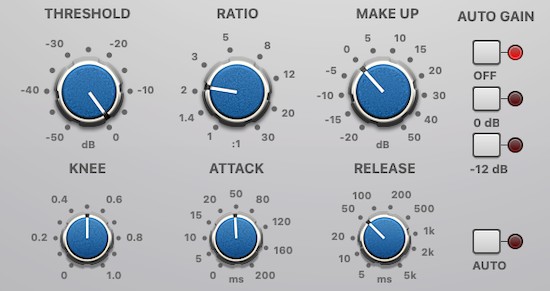
I tend to start at around 40 - 50ms for my attack and a similar if not slower setting for the release, with a VCA or opto compressor type / circuit selected. Again, I'm really only looking to take out around 1 - 3dB maximum from the signal, though naturally this is dependent on your mixing goals and the type of music / material you're working with.
I might want to add a little bit of gain back into the signal here to bring up the volume of quieter sections of my track also, whereas I don’t tend to add gain back into the transient control portion of the process.
Stack 'Em Up
And that’s it, hey presto! We’ve managed to tackle arguably the most problematic areas of our overall drum dynamics using just two compressors for very specific, distinct purposes.
The combined power of the compressors will help to iron out the 'lumps' in our drum signal as well as thicken up their overall feel, as we're helping to keep the quiet sections from being too quiet and cooling off the very loudest passages.
You can and should use a similar approach on any other transient-heavy material, such as percussion, plucked strings, plucked synths and so on. But don’t stop there; the next time you find yourself reaching for a compressor, just ask yourself if two could perhaps be more powerful than one!


