Welcome to the third part of my series exploring Reason's all-powerful Kong Drum Designer! So far, we've sliced and diced loops with the Nurse Rex Loop Player and built towering, layered drums with the NN-Nano Sampler - this week I'm going to delve into the details of creating realistic-sounding drums using Kong's impressive Physical Drum Modules. With such a vast array of tweakable parameters available across the various modules, knowing a little about how they all operative will help you to create great drum sounds faster. So without further ado, let's get designing some real-world-style drums!
A Solid Kick
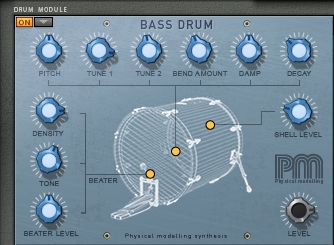
The Bass Drum is one of my favourite Physical Drum Modules. You can see in the middle of the panel that three areas have been highlighted with yellow dots - these show how different parameters are grouped according to the main aspects involved in producing sound from a real kick drum.
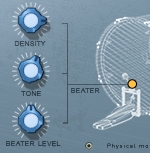
The left-most dot relates to the kick drum pedal, or Beater. Three parameters are available here: Density, Tone and Beater Level. Density approximates how hard the material of the Beater is, from soft felt down low to tightly packed and resin-bound on the right. Use a softer setting for a more bass-y sound. The Tone control alters how the 'click' of the Beater hit is filtered - turning this up results in a brighter attack that could cut through a mix better. The Beater Level control adjusts how much emphasis is given to this all-important attack portion of the drum hit.

Along the top of the Bass Drum panel are the controls relating to the drum skin, or membrane. The Pitch control is analogous to the overall size of the drum - turning this all the way down is like having an enormous kick drum well over a meter in diameter! Using this control is the quickest way to get the drum in tune with the other elements of your track. The two Tune controls, however, provide a more faithful reproduction of the way drums are actually tuned - by tightening lugs around the outside of the skin. The two Tune knobs interact similarly to how tuning two sides of a kick drum differently affects the sound - they alter pitch modulation, pitch envelope and timbre.
The Bend Amount control is like changing the elastic properties of the membrane. Turning this clockwise makes the pitch of the drum descend further after the attack portion, similarly to how a real membrane becomes less taught over the time of 200ms or so, having been tightened by the travel of the Beater into the membrane. The Damp control is another great one, simulating as it does the strategically placed pieces of gaffer tape you often see on drums in a recording studio. Keeping vibrations at certain points on the drum skin in check can have a great impact on how controlled the drum sounds, and turning this control up makes for a neater, more clipped kick sound. The Decay knob determines how long the fundamental bass note of the drum takes to die away. Kicks with a lot of sustain sound great when your tempo is a little slower.
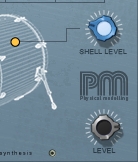
Finally, the Shell Level is a little like the microphone placement relative to the kick drum in a studio. Higher Shell Levels mean that the 'mic' picks up some of the air and resonance of the wooden walls of the drum.
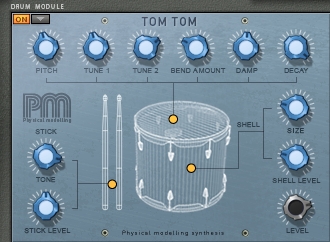
Tom Tom Navigation
The Tom Tom module has very similar controls to the Bass Drum, as the sound producing principles are very similar. Sticks replace beaters, with Tone and Level controls remaining available. The main difference is the addition of a Size control to the drum Shell group. This controls the depth of the tom tom, that is, the distance between the top and bottom membranes. Turning it down quite low, you can hear that the Size control brings in some resonance, which destabilises in realistic fashion with increased Size. Keep this knob up high for a big, beefy, live sound to your toms.
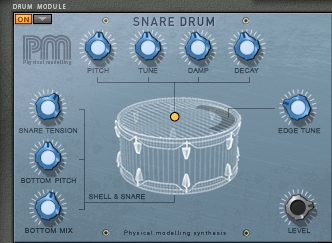
Snaring One Alive
The snare is probably the most realistic of the Physical Drum Modules - a veritable tour de force of detail, dynamics and realism! There are some fascinating sounds to be coaxed from this module, and you'll be able to create a very large number of drum sounds capturing the possibilities of physical configuration with this module alone.

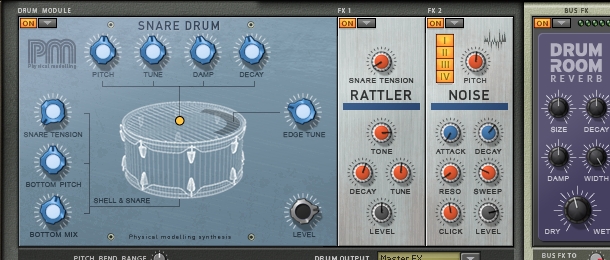
Let's start at the top for this one. The membrane controls are reduced in number on the Snare Drum module, with just four knobs to go on. These affect the sound of the drum as it would be with the snares removed - in effect a shallow, wide tom drum. Again, Pitch controls the overall size of the drum, whilst the Tune control alters the tightness of the membrane, influencing amplitude and pitch decay as well as pitch. The Damp and Decay controls are similar to those on the Bass Drum module, too.
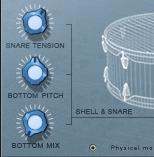
The Shell & Snare parameter grouping is where things really get interesting. Using sophisticated physical modelling algorithms, the drum snares are replicated in delicious detail. Scraping, ringing, resonating and rattling metallic sounds can all be dialled in with ease. Let's go through the parameters here - Snare Tension, when slack, injects the classic pink noise sound we're used to from electronic drum snares. This can be tightened up to produce the metallic ringing associated with snares pressed closely into the bottom membrane of the drum, before going silent as the snares become too tight to move independently of the membrane at all.
The Bottom Pitch control alters how the whole snare/ bottom membrane system vibrates, from a loose, rattling position down low to a tight and ringing set up higher up the dial. All of this complex and energetic sound can be mixed in to your heart's content with the Bottom Mix knob, which is a little like adjusting the position of the microphone by affecting the balance between snare sound and tom-like drum sound.

The final control on the Snare Drum module is the Edge Tune control, which only has an effect when the 'Edge' Hit Type is used. Selecting Hit Type IV in the appropriate panel, to the bottom right of Kong's drum pads, is the way to activate the Edge Tune parameter. Like hitting a snare drum off to the side, this produced a brighter sound with a greater degree of high resonance. You can access the Edge hit in the middle of a beat quite easily: just change the Drum Assignments.

To do this, select another pad (ideally right next to the pad(s) you're using for the snare with Centre/Position 1/Position 2 hits). Now, change that pad's drum assignment to reflect the pad that your Snare Drum module is loaded on. You can select different hit types for the pads, meaning that they send their different types of hits to the same drum module channel. Now, you can alternate which pad you hit in much the same way that a drummer chooses where to hit the drum on its membrane: cool, huh'
I hope this Reason Kong walkthrough has given you some useful information in order to get more of Kong's power out of the box and into your music productions. Kong contains such a good package of workflows for drums (and other types of sound material, in fact) that it really is worth getting to know its ins and outs in great detail - your music and listeners will thank you for it!


