Chances are, if you're an electronic music producer, you've heard of Sylenth1 by LennarDigital - it's a fantastic little synth plug-in which brings bags of analogue character in to your DAW productions. Here at ModeAudio Magazine, we've not spoken much about this excellent piece of software, even though it's one of our favourites! So this week, I'm going to start rectifying the situation with a breakdown of one of our Sylenth1 presets, and talk you through the different elements within it so you can try rolling your own.
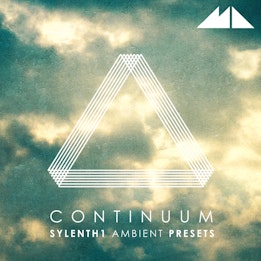
The preset is taken from Contour: a collection of 75 Sylenth1 presets for Downtempo music. Check it out if you like what you're hearing or would like to see some other Sylenth1 tricks in action!
You can also download this and a couple of other Pad presets from Contour at the bottom of this page!
The above is the sound of the original Pad preset, used on some MIDI chords included with the pack. As you can hear, it's quite a busy Pad sound: the tone shifts over the course of several bars and there is a more gritty, noisy texture alongside the basic sawtooth sound.

Foundations: Oscillator A1 + Amp Envelope
To begin with, I need a base on which to build up the sound. Sawtooth (aka ramp) waves, which you can see I've selected in the image above, provide a very rich and solid harmonic spectrum. This gives you lots of spectral material to sculpt using the filters and FX. The only tweak I've made to the saw wave in the Osc A1 section is to pan it left a little, so that if I pan another of the four oscillators to the right, I'll get a bit of variation between the two channels of the stereo output. To the right, you can see I've lengthened the attack, decay and release of the amplitude envelope in order to round out the abrupt level changes of the default settings a little.
This is how it right sounds now:
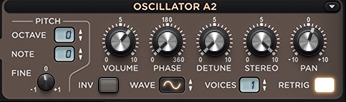
Body: Oscillator A2
Next, I'm going to bolster the root notes (as opposed to the harmonics) of the sound by dialling up Osc A2 with a sine wave. As you raise the oscillator's volume, you'll hear the sine adding smoothness and body to the notes. I've panned the oscillator to the right a little, corresponding with the leftwards panning I applied to Osc A1. The final touch is something I love doing: I've detuned it just a touch using the 'Fine' tuning control in the oscillator's Pitch section. This adds a hint of instability to the sound spectrum, as the lowest (root) harmonic of the saw waves and the (only) harmonic of the sine wave interfere, their slightly different frequencies causing some variation in their relative amplitudes at the mixer output. I haven't used the 'Detune' control as both oscillators are set to have only 1 voice, keeping clarity in the sound. The Detune controls change the amount of detuning between multiple voices of the oscillators, which we aren't using here.
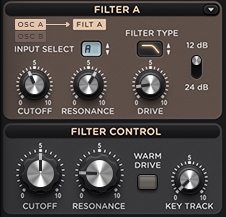
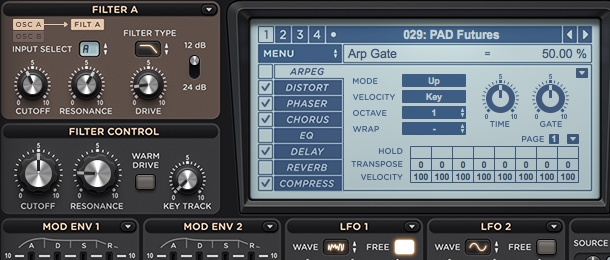
Tone: Filter A + Filter Control
It's time to start smoothing out the top end of the sound to get rid of some of that sawtooth buzz. The best tool for this job is a low pass filter, which cuts out the highs. I've dialled the frequency down a little from the default, and raised the resonance to give it some character. As the filter is now cutting out quite a lot of the sound's spectrum, the volume has dipped, so I've also raised the drive and switched the filter to 12dB/octave so make it's effect a bit less intense. The resonance knob in the Filter Control section has also got a bit of a boost - this will be applied to both Filter A and Filter B.
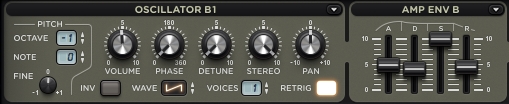
Depth: Osc B1 + Amp Envelope
Now, I've switched over to Part B of this Sylenth1 patch. In Osc B1, I've dialled the default sawtooth down by one octave and lowered its volume. This will add some depth and low grit to the sound. I've also raised the 'Fine' tune a touch to get some more phase interference going on. Compared to Oscillators A1 and A2, Part B's envelope has a slightly longer attack and faster decay. This stretches the timbral development of the note out in time a little, keeping things interesting.
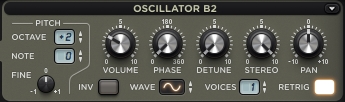
Brightness: Osc B2
Having bolstered the low end of the sound with Osc B1, I'm now going to strengthen the mid-highs with Osc B2. As you can see, I've raised the sine wave up by octaves. This adds a chime-like quality to my pad. I don't need much of this for it to have its effect, so I've set the volume quite low.
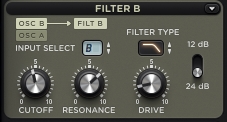
Tone Again: Filter B
Again, I need to smooth out the top end of the sawtooth, this time in Osc B1. Another low pass on Filter B, with some resonance and a bit of drive, does the trick nicely.
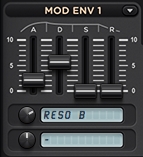
Timbre Development: Mod Env 1
I've routed Mod Env 1 to Filter B's resonance to vary the amount of resonance over the course of a note. With a noticeable attack and a long decay, this tweak raises and then lowers Filter B's resonance just enough to add some extra variation. As you can hear below, this adds just enough extra resonance to start to make Filter B ring at the frequency I set. This adds a bit more complexity and interest in terms of the pitches.
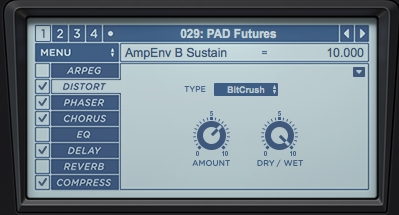
Special FX 1: Distort
Now, I want to add some grit into the mix. The Distort FX, set to BitCrush, is a great way to do this: just dial in enough to inject some satisfying hiss and grunge.
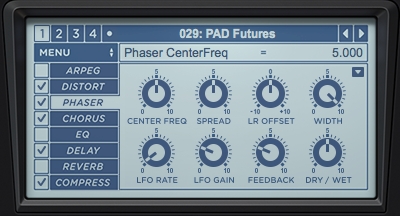
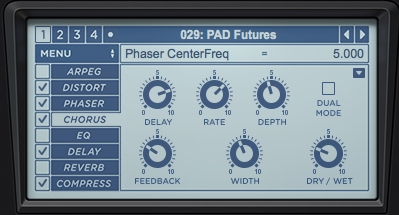
FX 2: Phaser
I've added some Phaser set with a slow LFO rate to make some gradual timbral variation in the sound.
FX 3: Chorus
Just a tiny hint of Chorus helps to blur the sound spectrum a little, if you see what I mean.
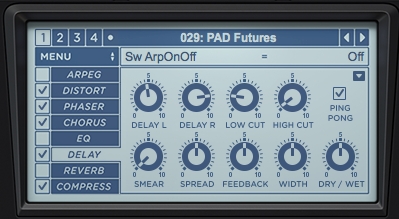
FX 4: Delay
A bit of delay blurs the sound out in time, too.
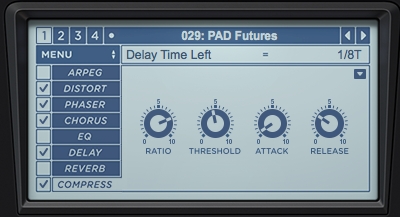
FX 5: Compress
And lastly for the FX, a bit of compression smooths the levels out, which is important due to all of our phase interference causing the main output to vary in amplitude!
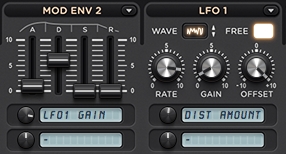
Texture: LFO 1 + Mod Env 2
Last but not least, I'm going to add some extra grit in the form of the noise waveform on LFO 1. I've routed the LFO to the Distort FX's 'Amount' control, and set up quite a high frequency for the LFO. Try playing with the amount of control signal you're sending to see what works - as you can see, I've got the gain low and the send level low, too. I'm also using Mod Env 2 to raise the gain of LFO 1 towards the start of the note, before taking it back down close to nothing.
Now, I hope you'll agree, we've got a really characterful pad sound going on in Sylenth1, with just a few basics and some judicious tweaks! I've included a couple more presets from 'Contour' in the .zip below - so check out some other ideas and get sculpting with Sylenth1!