

Sidechain compression is always a popular topic in the music-making world, and some would argue that it's a necessary technique to have under your belt as a producer.
The sidechain technique is typically deployed when we have excessive, low frequency energy - most often when our kick drum and bassline play together.
In such a situation, many producers will feed a copy of the kick drum signal into a sidechain compressor loaded onto the bass channel, using the kick to 'duck' the volume of the bass when the two coincide.
Though this is the standard way to apply the technique, today we're going use FL Studio to show you a cleverer way that should yield even better results!
As mentioned above, when we say our kick and bass clash, we mean they are competing for space in the mix, usually causing 'muddiness' or lack of clarity, and even unwanted distortion.
This 'competing' is mostly happening in the lower frequency range though. What if we use sidechaining to target only specific frequencies, instead of affecting the whole spectrum?
If we use the standard technique, we will be turning down clashing frequencies, but also turning down non-clashing, higher frequencies with them.
Fortunately, FL Studio allows us to be a bit more subtle in our approach:
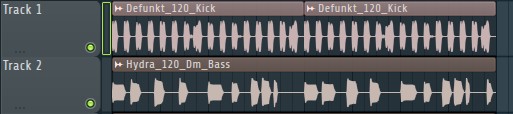
Here I've loaded a kick and a bass loop from our latest pack Mineral - Ambient Techno Loops, which uses a lot of deep, subby kicks and basslines. I've also made sure to give them their own mixer channel each too.
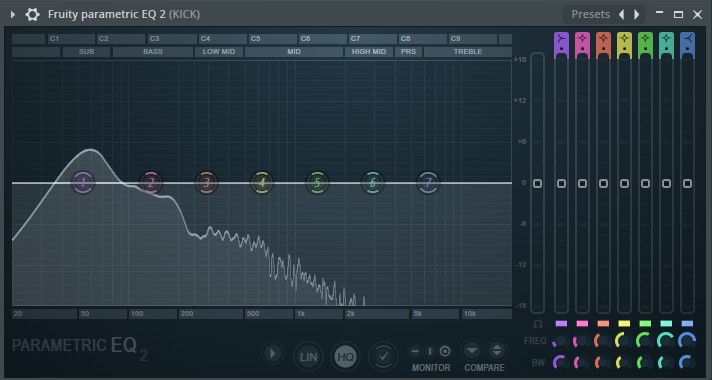
On the kick channel, I've added the Fruity parametric EQ 2 to the first FX slot, simply to observe the frequency spectrum of the kick signal. As you can see, there is plenty of energy in the lows around 50Hz.
Let's do the same with the bass channel:
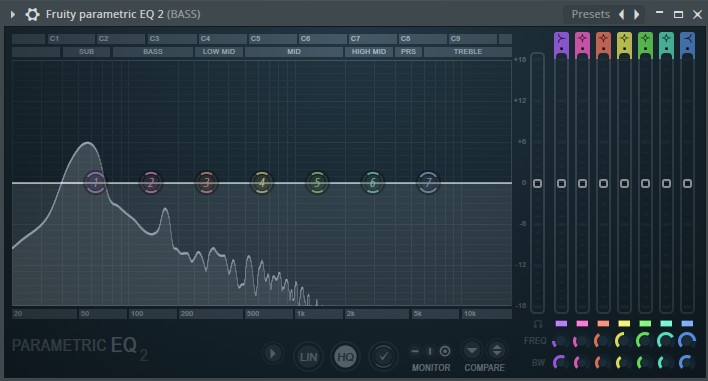
Just what my ears confirmed! There is some competition going on in that lower area.
Now for the clever part. Head back to your FX inserts section for the kick channel, and add the Fruity peak controller.
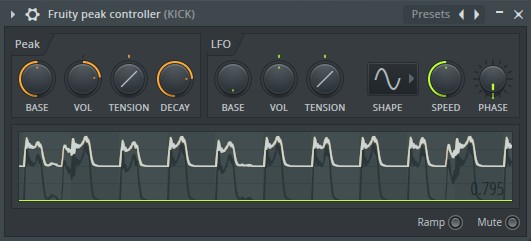
This is one of FL Studio's internal controllers, and in this case we're using the Peak section to track and output the volume envelope of the kick.
Make sure you bring the Base dial up to 50%, you can probably leave the other default settings how they are for now.
This is one of those nifty little tools that people often overlook because it doesn't do anything immediately to your sound. We need to hook it up to a target parameter to really get the magic.
Now, heading back to the parametric EQ we have on our bass channel, we adjust one of our EQ nodes so it sits at the same frequency where our kick was strong (~50Hz).
In this case, I've used the 2nd node as its EQ type is already in 'peaking' mode (If you use Node 1 you may want to change to this type).
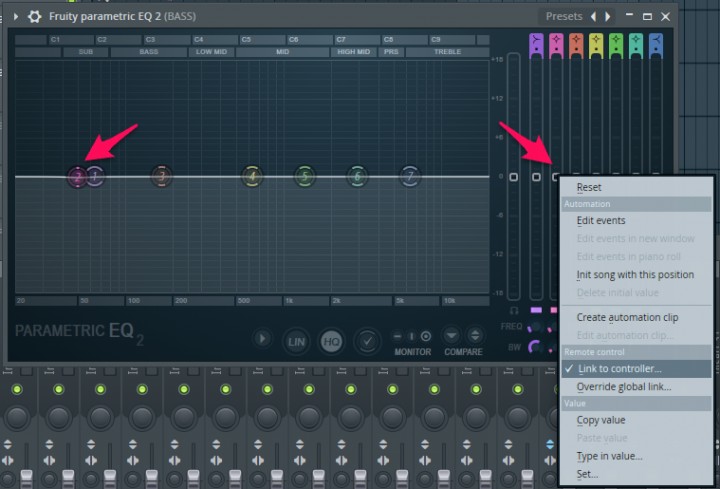
We then right-click on the gain slider for this node and select 'Link to controller'.
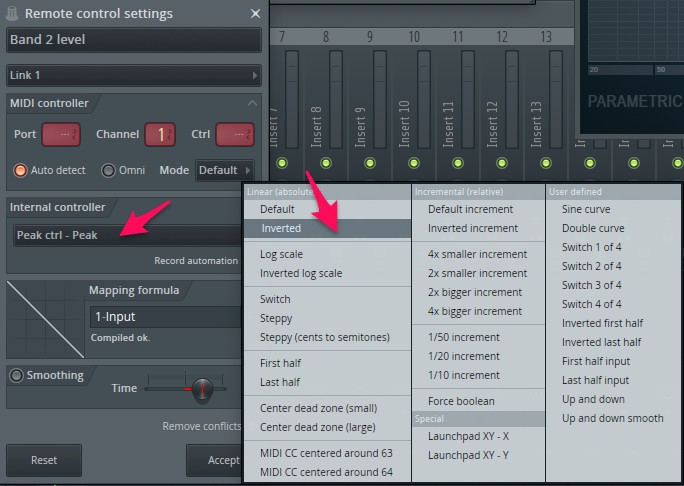
In the Internal controller section, select 'Peak ctrl - Peak' from our kick channel, and make sure the Mapping formula section is set to 'Inverted'.
Now if we play our kick and bass together...
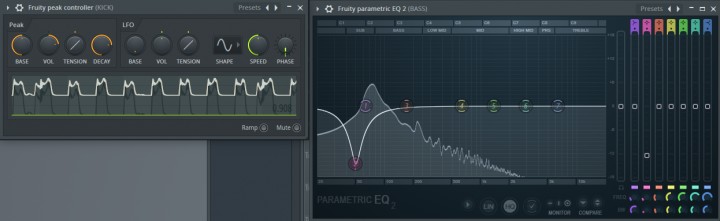
You should now see our EQ node dipping in time to the kick drum! This means that every time the kick hits, the corresponding frequency in the bass is turned down (and not the whole bass signal).
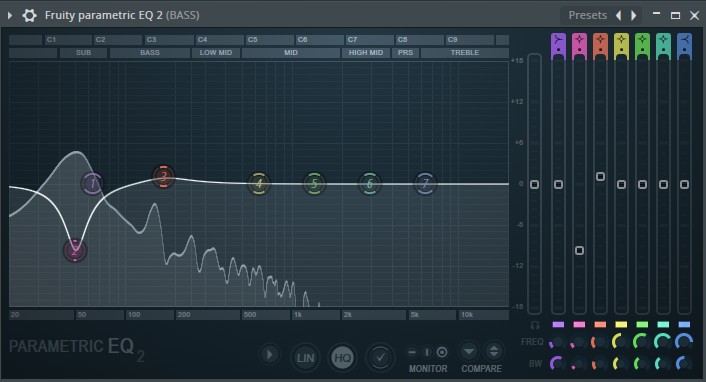
This should give us a more targeted and subtle sidechaining effect on our low end. We may even decide to give our bass a little boost between 100 - 200Hz where the harmonics of each note are hitting.
This can help to further create cohesion between the two parts, and even more clarity to the bass:
Also feel free to tweak the Volume and Decay controls on the peak controller. Do this during playback so you can see (and hear, more importantly) how the EQ is reacting.
The volume dial will affect the depth, or gain, of the EQ, and the decay will affect the speed at which the EQ returns to default.
Let's take a listen to the final result in context, adding in some more loops from Mineral - Ambient Techno Loops:
The sidechain can be applied in a variety of ways, and doesn't necessarily have to be for purely mixing reasons. Check out our article Exotic Rhythms: Sidechaining Textures & Noise and discover some creative applications of the technique.
Until next time, get creative!


