It's a well-stated opinion that drums are the backbone of many a tune, especially when it comes to dance and electronic genres. With many dance styles and sub-genres typically conforming to very strict and distinctive percussive patterns - such as the ever-present 4-to-the-floor kick drum, designed to keep dancers moving in sync till the end of the night - the challenge for music producers can turn from one of creating fresh beats and rhythms, to how best to play around with existing patterns.
In this tutorial, I wish to present one solution to this problem - spicing up dance drum rhythms with found percussion. This will involve layering up a solid, classic drum beat with a much more interesting found percussion groove, as well as introducing some very simple effects to further enhance the groove. I'll be using Ableton Live 9 for my music production tutorial below but the tips and techniques explored can be equally applied to any and all DAWs out there - you can also download free WAV drum loops and the MIDI files used in the discussion below, at the end of this article. Let's get spicy!
1. Programming a Classic House Drum Loop
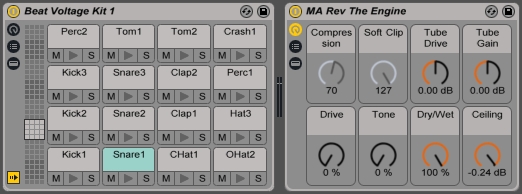
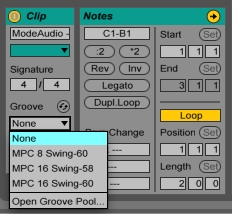
To kick things off, let's find some nice samples and construct a simple yet classic, House-style drum beat. I'm using samples from our Beat Voltage - Drum Machine Samples pack, which comes with a number of ready-made Drum Racks for exactly this purpose. Using only a little compression and a limiter to beef up my drum sound, I've setup my drum pattern using the classic 4-to-the-floor kick drum found in the majority of House and Techno tracks. With typical snare samples placed on beats 2 and 4, I've created a bit of extra interest by inserting some additional, swung hi hats to the usual constant off-beats. I used Live 9's excellent groove pool resource (accessed by double-clicking the MIDI clip and hitting the button next to 'Groove' on the lefthand-side) for my swing template, choosing the 'MPC 16 Swing-60' pattern to introduce some classic rhythmic feel.
Listen to the groove in audio example 1 below:

So far so classic, so I'll add a little bit of reverb to my snare drum and hi hat samples to lift them a little and create a subtle sense of space. Using a return chain from within my drum racks chain list (hit the little 'S' and 'R' buttons at the extreme left of the rack, right-click in the 'Drop Audio Effects Here' space, hit 'Create Return Chain' and select the send track from the 'Audio To' drop-down on the newly-created return chain), I can send as much snare and hi hat signal to my reverb channel, whilst leaving the kick drum completely dry.

You can hear the effects in audio example 2:
Here's our classic, 124BPM House drum loop, lovingly prepared with a touch of reverb'it's a bit boing isn't it'! Well, now it's time to introduce some percussion to spice things up!
2. Found Percussion Sample Fun
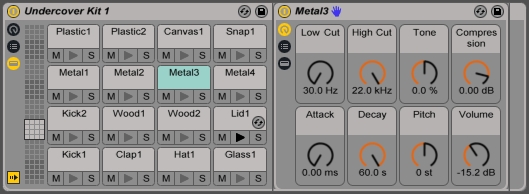
Track down some tasty percussion samples (you can get creative with your mic or pick up our own, carefully recorded found percussion samples) and fire them up into a drum rack. I'm using a pre-mixed and matched drum rack from our Undercover - Found Percussion Samples release - let's begin by simply copying over the clip from our drum machine samples track and move the patterns around the piano roll till we find some samples that work. I don't want to overpower the drum groove here - this is about subtle layering to add some intricate musical vibe - so I've kept my selected organic percussion samples low in the mix and added reverb to help them sit with the main drum machine samples. Take a listen in audio example 3:

Now we're starting to get somewhere! The groove is still sounding a bit flat though, so let's add some syncopation to our percussion track to improve the rhythm. I'm not going to go too crazy as I really just want to embellish the main groove, rather than totally transform it - you can see in the screen grab image below that I've just peppered a few, off-kilter samples over the pattern of the central beat (I've opted for a wooden stick sample and the sound of the striking of a metal tube), again keeping things very quiet to ensure fluidity between the drum samples and percussion.

I used the same MPC-60 groove template as before, so you can really see the swing taking shape in the subtly displaced notes on the Kick2 and Glass1 rows (I've 'committed' the template here so you can see the swing displacement but it's often best to leave the template loaded in rather than printed, so any new samples you draw or play in conform to the same swing template). In addition to the syncopated percussion hits, I also want to introduce a lazier, groovy feel by using a sample with a bit of internal rhythm not necessarily synchronised with my master tempo. Many of the samples included in Undercover have this quality, so I've used the 'Snap' sample included in this drum rack (which is a sort of elongated 'crunch' sound) to introduce a more relaxed rhythmic element to my beat. Let's listen to the results in audio example 4:
3. Delays & Rhythmic Samples: Adding A Final Flourish
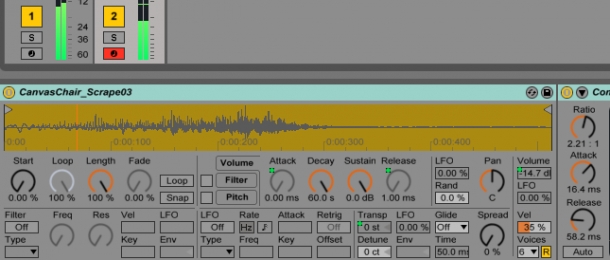
The syncopated percussion notes really give the groove some momentum, whereas the Snap sample helps to introduce a lazier, more characterful vibe to the rhythm. I'm pretty happy with how things are sounding but I want to add just a little extra something to elevate my beat further. I'm a big fan of short reversed and sweep sounds within drum patterns, that lead the feel of the beat towards particular points - I can achieve that with my percussion rack thanks to the 'Canvas' sample, which is a reasonably long, scratching sound. By turning the sample's release in Simpler to close to 0ms and decay to a much larger figure, I can make sure I can control the sample's length with the MIDI block I will draw in the found percussion clip. I want the Canvas sample to lead into the first snare sample heard every 4 bars - you can see how I've arranged this in the image below.

As the icing on the cake, I want to create more of a peak at the points the Canvas sample is leading into - I could do this by finding a meatier drum sample or more prominent percussion sample to place on these beats but as I'm going for a subtler approach here, I'm going to call on Ableton Live's humble delay plugin to draw attention to these moments in the groove. Choosing a further sample from this Undercover drum rack, a soft 'Plastic' hit, I can setup another internal return chain but this time send the signal to a track with Live's delay plugin loaded up, rather than the reverb we used before.
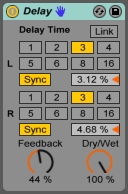
Live automatically loads up a stereo delay device on the second send channel in every new session, so I just need to tweak the setting a little to get the delayed signal to sit better with my groove. By calling on a bit of swing and setting the two delay lines to have subtly different amounts, I can get the delayed percussion hits to fall in the right places and improve the sense of the stereo field (leaving the two delay lines with identical delay times and swing amounts would result in the perception of a single, centrally-panned delay signal rather than two separate ones).
Let's give these tweaks and touches a listen in audio example 5:
And it's as simple as that! By subtly layering in some decent found percussion samples and using a touch of reverb and delay, we've elevated a classic, but rather dull, House drum beat into something far more characterful and organic. I hope you've enjoyed this Ableton Live tutorial and get transforming those rhythms!
Download a selection of free drum loops, as heard in the audio examples above, as well as the MIDI files used using the button below.


