
If there's anything that the early years of the new millennium taught us, it's that low-pass filter sweeps sound awesome in the lead up to a drop. Especially if you are from Paris. But the classic way of doing this ' using an analog stereo filter on the bus or master channel ' requires a little bit more setting up inside a DAW; compared to four patch cables and loads of money, at least!
I'm using some rhythm section loops from 'Polychrome Beats' for this tip, so if you like what you're hearing, check it out. Here they are, untouched:
Fortunately for us, we can program in all of the musical range and versatility of the old analog filter in Ableton using nothing more than an Audio Effect Rack and Live's trusty Auto Filter. And, even more fortuitously, you can download the 'SuperLPFilter' preset that I'm showing you how to program right at the bottom of this article!
Filter Me Silly
First up, I just need to drop an empty Audio Effect Rack onto my master channel in Live, as in the image above.
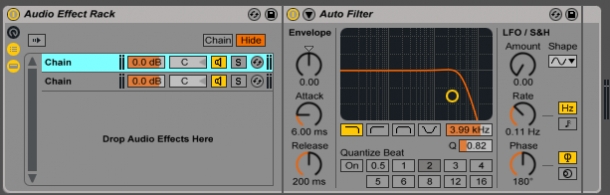
Next, I drag an Auto Filter onto the blank space of the Rack.

Now, I click the middle button of the little column of three buttons in the top left of the Rack. This opens out the Chain List.
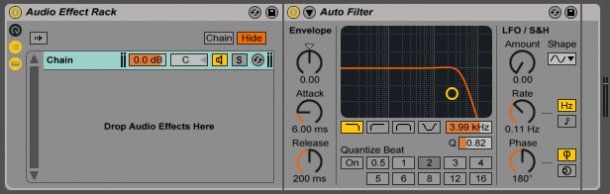
You can see that my Auto Filter has its own chain. Right now, everything that comes into the Audio Effect Rack has to go through the filter before it gets to the Rack's output.
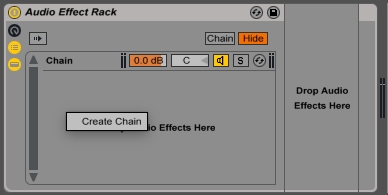
If I right-click (or ctrl-click on Mac) in the blank area under the Auto Filter's chain, I can choose to create a new chain.
Like this.
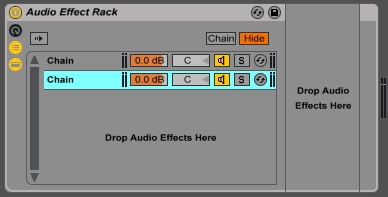
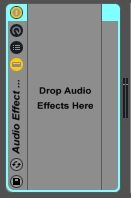
The new chain I just created is empty: anything that goes into this chain will pass straight through unaffected.

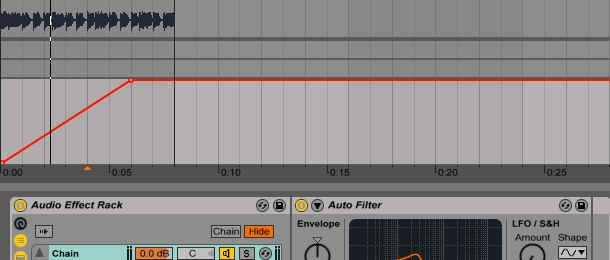
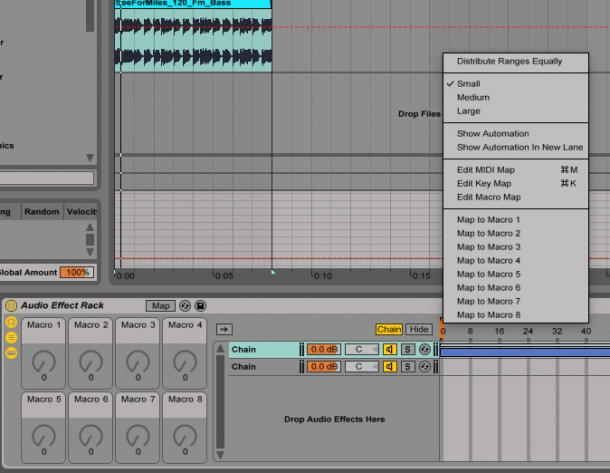
Next, I'm going to click on the little box above my chains, called 'Chain'. This shows me the Chain Select Editor.

See how the numbers along the top range from 0 to 127' That's because we can move that little orange line currently sitting at 0 ' the Chain Selector ' using MIDI. But I'll come to that in a moment. For now, I'll just drag out the right-hand edge of the Auto Filter chain up to 126, and shift the whole of the empty chain up to 127 (all shall become clear shortly ;).
If I turn up the knob, this is what it does to the sound:

OK, now I'm going to click on the top button of that little column of three buttons in the top left corner. This shows me the Audio Effect Rack's (currently greyed-out) macro controls.
Now, I'm going to right-click on the little orange Chain Selector, and choose 'Map to Macro 1' from the menu.
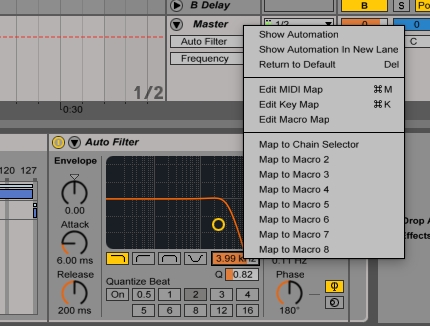
Now, if I head over to the Auto Filter and right-click on the Filter Cutoff control, I can select 'Map to Chain Selector'.
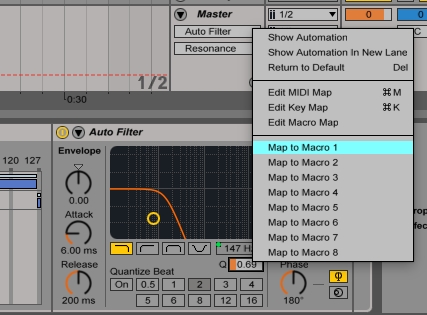
The whole reason for using one of the Rack's Macro controls for these assignments is that it means I can control several parameters from one input. You may have noticed that having a high Q setting sounds great when a low-pass filter is up high, but causes all sorts of overdriving-bass-type issues when the cutoff is down low. Well, if I go ahead an right-click the Q control to assign it to my Macro (which has now gone back to being called Macro 1, as it is about to have more than one parameter to control)'

'I've now got both the cutoff and the Q assigned to a single knob, and both change when I turn said knob'
'like so.
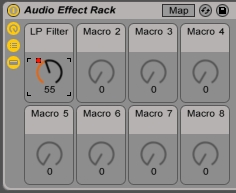
I'm going to rename 'Macro 1' (by clicking it and hitting Alt+R on my Mac) as 'LP Filter'.
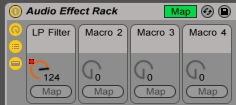
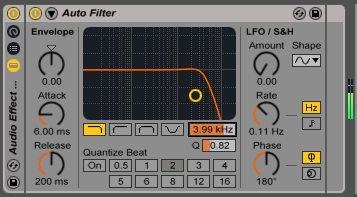
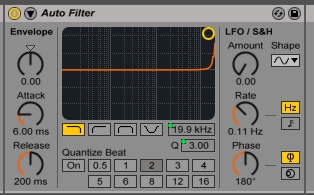
I just need to made some final adjustments, now. You notice how the filter cutoff is knocking out almost all of the audio long before the knob reaches the bottom end of its travel' Well, if I click on the 'Map' box near the Rack's preset name, I'm shown Min and Max controls for all of the parameters being controlled by Macro 1.

I'm going to bottom out the low end of the cutoff at 100Hz so it never gives me pure rumble with no bass and I'm going to top it out at 10kHz. You remember how I moved the empty chain's Chain selection area all the way up to 127' Now, when I turn the knob right to the top of its travel, the chain routing will switch from the Auto Filter chain over to the 'bypass' chain, effectively lifting that final 10kHz of top-end filtering right off in an instant! It's a lot less fun moving the filter all the way up there, and this means I now have lots more control of the lower region, which is a way funkier place to be.
I'm also raising the low-Q to 0.5 (more Q = more funky) and lowering the high-Q to 2. (too much Q = ouch!). Click out of the Map mode and hey, presto! I've got a perfectly tuned, super-funky LP Filter to play with!
I hope you've enjoyed this little tutorial and have some ideas for other ways in which you could use this technique (hint: high-pass filter!).
Download my super LP filter preset using the button below and enjoy!


