
Mastering is a dark art that takes decades of relentless study and aural training to perfect, however having a basic understanding of the core principles can do wonders in helping to improve your mixes. This is because often it is useful and desirable to introduce a few processing plugins to your DAW's output or master channel, which in turn helps you to coax the disparate elements of your track into a cohesive whole. Obviously, professional-level mastering is the icing on the cake here but tweaking the right plugs on your master bus will improve the clarity and weight of your mix, as well as encouraging go od mixing practices.
Firstly, a quick caveat. No audio principle, process or practice is 100% applicable to all types of material all the time, so it's worth pointing out that if you're after a loud, pushed, aggressive sound tending towards the undefined and ambient, then the following tips are not for you. For everyone else however, read on'
Mix Master Me
Possibly the single most important mixing principle I have learned came about as a result of tinkering with master bus processing. When I first attempted doing something like this, I simply started adding things like compression, limiting and maximising to my master channel with no thought paid to what was actually coming into the bus. I quickly found that cranking up the compression and pushing the limiters to extremes certainly led to a louder sound, but one that was wooly, uneven and, to put it on one word, messy.
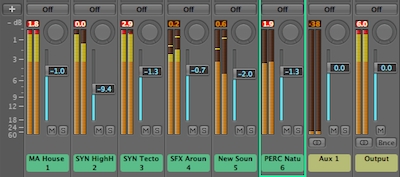
My problem was that I was running individually hot signals (synth, bass and drum channels that were themselves peaking or running into the red) into the master bus, resulting in a summed signal that was vastly exceeding unity gain (0dB).
The Answer
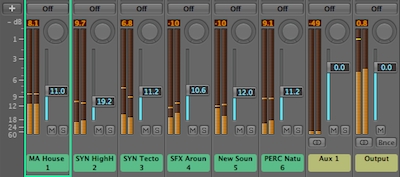
The answer was simply to reduce the volume of all my channels (not including the master). Sounds simple right' It's actually much harder to do in practice than you think because we tend to want to listen to things loud in order to judge them as a finished product, even before we've probably started to produce and work the material.
Another factor compounding the problem is that most DAWs give you ample headroom way about the 0dB mark on individual channels, meaning you can drive them till you're blue in the face and not hear a noticeable digital click or pop. What you also won't hear with this approach however, is a nice, balanced, clean mix where you can distinctly hear and pick out each musical element with ease.
It has taken me a while to unlearn this tendency to crank things up but now I have finally done so, I can heartily recommend the results of reducing individual channel volumes. What this also lets you do is leave all the volume pushing to the modules that do it best - compressors, limiters and maximisers.
1. Compression
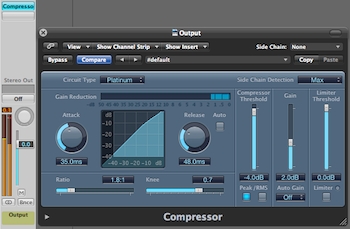
So, you've processed your individual parts, are happy with their sound and are sure they aren't clipping themselves or pushing your master channel into the red. Traditionally, the first process to introduce on your master bus is compression, although it's always well worth trying EQ or something else first to find out how it sounds. The point is that even experienced mastering engineers can't quite tell you why compression is often favoured before EQ and whilst it seems to work more often than not, there is always room for experimentation.
As a basic rule to follow before tweaking and customising as you see fit, I recommend very light and gentle compression just to help bring the parts of your mix together. A ratio of something like 1.8:1, with a threshold of -6dB or so, combined with relatively slow attack and release settings (25ms+ for the former, 50ms+ for the latter) should give you some fairly gentle gain reduction, allowing you to raise the overall volume with makeup gain by about 2 or 3dB.
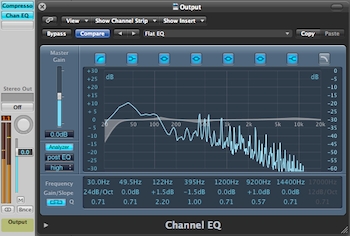
2. EQ
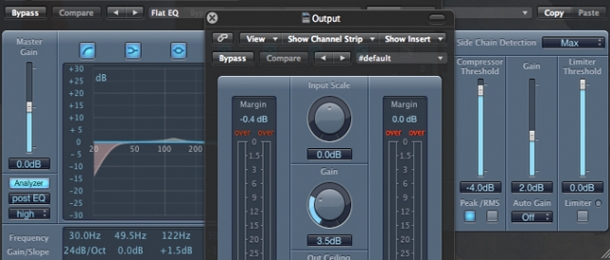
Next, you might want to try some EQ. A typical use of master bus EQ is to cut out unnecessary low to sub bass frequencies that firstly, your speaker system may not be able to reproduce, secondly you probably won't be able to hear anyway and thirdly (and most importantly), will only take up valuable headroom when it comes to limiting.
I tend to start by cutting at around 25>30dB with a pretty severe shelf (24dB per octave). If your track is especially sub-heavy or to be played out on a professional club system with dedicated sub woofers, you might want to lower this but otherwise, these are pretty handy and reliable figures to stick to.
What you do with the rest of your EQ notches and shelves is entirely up to you and your judgement of the material passing through the device. Are things a little too bright' A gentle high shelf roll-off may be the answer. A bit too muddy in the lows' Try cutting at ~400Hz to improve bass clarity (be careful though, cut too much and you'll end up with a perceptibly 'colder' sound). Let your ears be the guide - respond purely to what you hear and you'll make good decisions and remember, deciding not to apply any further EQ is a perfectly valid option!
3. Limiting/Maximising
The final stop in our tour of the most essential master bus processing tools is possibly the most exciting - the limiting and/or maximising stage. The reason I say this is perhaps the most exciting point in the journey is because this is when you get to make things as loud as you want! Obviously, the louder you go the more you push your plugins, introducing the possibility for distortion, the more you flatten peaks thus influencing delicate transient clarity (the bite and sharpness of your music) and the more you reduce the dynamic range of your music (a vital influence on the expressive quality of your music).
Generally speaking, you'll want to start with very quick attack and release settings so as to minimise the audibility of the limiter's influence on your mix. The more you drive the sound through the limiter however, the harder it will be to erase its aural presence and you'll really start to curtail the transients in your music. So, again testing out different values is always worth your while, especially if you're increasing gain with a maximiser.
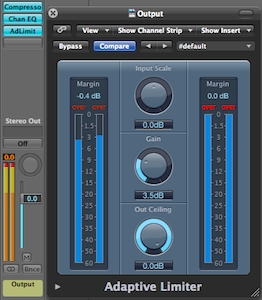
Maximising can be applied instead of, or even alongside limiting and can often help to crank out a few extra dB of volume from your mix. I would certainly be wary of driving things too hard though (we don't want to undo all of the effort we've gone to above in improving the clarity and balance of your mix) but it can sometimes act as the glazed cherry atop the gleaming cake of your mix.
Thus we've reached the end of our look at essential master bus processing. I hope you've enjoyed it and picked up a tip or two to try out in your music. Remember, leave the volume to the masters, ahem, I mean master bus processors and never worry about trying something different.
Check out more of our mastering tutorials here.


