
At its heart, Native Instruments' Massive is a wavetable synthesiser. Its full implementation of the wavetable principle, along with its powerful semi-modular modulation capabilities, is what gives it such versatility, and its ability to morph between some fundamental synthesis parameters before the signals even leave the oscillator section.
What is Wavetable Synthesis?
The oscillators in most soft synths - whether subtractive, additive, FM, etc. - resemble those in wavetable synths quite closely. This is because, generally, software oscillators are really just a small sample buffer loaded with a pre-calculated, single cycle waveform.
So, a sine wave oscillator in a soft synth is a series of samples that describe one period of a sine wave: one peak (+1) and one trough (-1), starting and ending at the zero-cross line halfway. There may be several hundred or thousand samples in this buffer, determining the 'resolution' with which our sine cycle is stored.
The buffer is then read out over and over again, 440 times per second if we play the oscillator at 440Hz (concert A). This means that the sine wave does not have to be generated algorithmically in use: it is simply read at a rate of our choosing, which is much less taxing on the CPU.
True wavetable synthesisers like Massive, however, take this principle one step further. The sample buffer does not contain just one waveform; it contains several (up to five, in the case of Massive), sequenced end to end.
We can then control the mix between these different waveforms, as the oscillator can read more than one point in the sample buffer and compute the average of the values, giving us our output. In Massive, we do this using the 'Wt-Position' control ('Wt' meaning 'wavetable'). This averaging computation gives us a smooth gradation between the five waveforms loaded into the wavetable, and so greatly expands the range of timbres available from the oscillators.
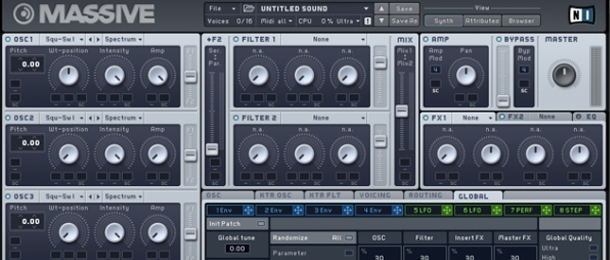
Routing in Massive
Massive's envelopes, LFOs and two stepping modulators ('Performer' and 'Stepper') can be routed by clicking the cross shape on their tabs and dragging to the slot underneath the parameter you which to affect (see Modulation Sources). However, there is also a 'Routing' page in the tabbed interface. This allows us to make certain adjustments to Massive's signal path.
Bypass
Here, we can choose which oscillator (or the noise source) bypasses the filters and insert FX, patching straight into either of the main FX or the EQ. By default, this is Oscillator 3, which is often used to provide a sub-bass tone. This means you can, for example, high-pass filter the main oscillators, whilst retaining the depth of our sub tone, which is now 'pocketed' (occupying its own space in the frequency spectrum).
To hear the bypassed signal, bring up the 'Bypass' fader, next to the Master volume control. To change which source is bypassing the filters, click on the 'B' square next to your chosen source in the Routing page.
Insert FX
We can also independently choose where our insert FX are patched in. By default, Insert 1 is directly after the first filter, and Insert 2 is directly after the second. In this configuration, we could adjust the ''F2' slider towards 'Ser.' (meaning 'Serial', as opposed to 'Parallel'), and so have our signal filtered by Filter 1, altered with the Insert 1 FX, then into Filter 2 and the Insert 2 FX. By clicking on the 'Ins' boxes in the Routing tab, we can change which of the available patch points the Insert FX are using.
Either Insert FX (or both) can be: before the filters, directly after them, in between the filters (which will only work when the ''F2' slider is not fully towards 'Parallel'), directly after the point at which the two filter outputs have been mixed, or inside the Feedback loop.
Feedback Loop
Finally, we can choose where the Feedback loop patches out of the signal path. The Feedback loop lets us route signals from a point in the signal path back into the the filters. Using this allows us to repeatedly filter the same signal, bringing out subtle resonances or screaming mayhem from the oscillators/ filters configurations.
By default, the Feedback section is switched off, so turn it on by clicking the word 'Feedback', just next to the Noise source. Bring its volume up slowly, as Feedback can get very loud, very quickly. In the Routing page, change where the Feedback loop patches out by clicking on the 'FB' boxes.
If Feedback is switched on, we can see a line passing from the FB patch point to the Insert FX patch points along the Feedback line. This line is coloured blue to distinguish it from the regular signals (grey) and the Bypass line (yellow), as the signal along it is flowing from right to left.
We can choose to patch the Feedback loop out from just before the main FX and EQ (the default position), or from after Filter 1, Filter 2 or before the Amp/ Pan section. If you only want to resonate one of the filters, choose the FB patch point directly after the filter you're using.
Using the patch point just before the Amp/ Pan section is useful if you do not want your Feedback resonance to develop in response to the main amplitude envelope (Envelope 4 in the 'Amp' section), but you will likely get a more natural sounding patch if you leave the FB patch point in its default position, just after the Amp/ Pan section.
Now you know what all Massive's bits are, you can get even more use out of our collection of presets! If you want to learn more, check out our more advanced Massive tutorials:


