
Welcome back to my tutorial series exploring all the power and flexibility of the humble MIDI file. In this article I want to share a nifty trick for using MIDI as the source input for sidechain compression and filtering, working with loops and their MIDI equivalents as they're found in all ModeAudio loop packs.
Having both an audio and MIDI version of a given loop is incredibly handy as we'll see, as it allows you to use the same material for different purposes at the same time as well as giving you the ability to tweak the pattern stored in the MIDI loop at any point.
In ModeAudio loop releases, we give you both the audio and the exact MIDI used to generate it but you can always construct your own MIDI files to use for the purposes I'll describe below - this will be easier or harder depending on the complexity of the pattern you want to copy of course.
For this tutorial I'm going to assume you have both an audio and MIDI file version of your loop - I'm going to use a drum loop from String Theory - Hip Hop Guitars & Beats along with Logic Pro X's internal plugins but you can of course extend the following ideas out to any given musical material or DAW.
Sidechain Compression: MIDI Magic Part 1
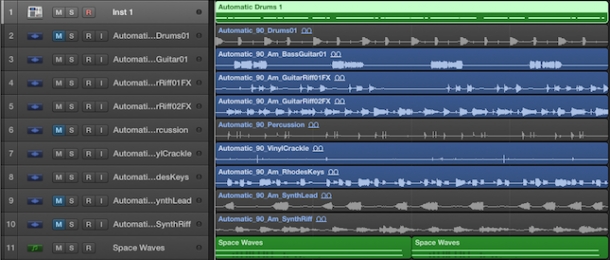
Let's begin with some sidechain compression. I've dragged the drums and melodic parts of the 'Automatic' set of loops from String Theory into Logic Pro X and am going to use the drum pattern to sidechain compress both the rhodes keys and one of the guitar loops. I've put together a quick mix and here's how they sound together:
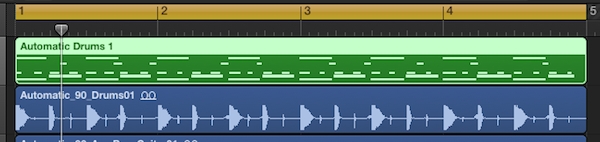
The most obvious method you could adopt here is to simply throw the entire audio signal of 'Automatic_90_Drums01' into the sidechain input of a compressor loaded on the keys and guitar channels - however, this will compress both parts whenever any part of the drum loop is playing, so in this case, almost constantly over the course of the 4 bars:
It's quite tricky to hear the effect, other than an overall reduction in volume. I want much more control over the signal acting as the sidechain input so I can decide exactly when the compressor is going to act and when not. To do this, I'm going to employ the drum loop's MIDI file equivalent - however, as we know, a MIDI file doesn't store any actual audio information, only the locations of note events across the piano roll.
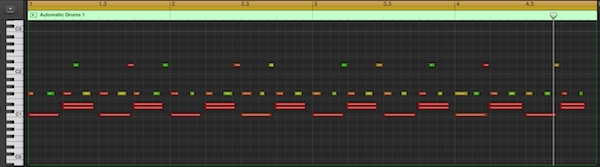
So, I'll need to use the MIDI to generate some audio - in this case I'm simply going to use the default patch that loads with Logic's Ultrabeat drum synth. Now, I don't actually want Ultrabeat's output to be audible, I just want to use it as a sidechain source so the audio it generates isn't that important though you'll want decay times to be roughly equivalent to what you have in your audio.

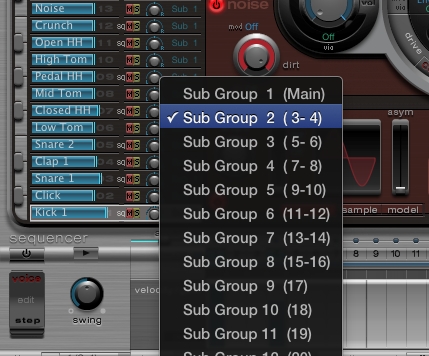
In this case, I'm going to use only the kick pattern to sidechain compress the keys and guitar, so having listened to Ultrabeat's output to make sure the kick I'm generating is similar to the kick present in my drum loop (i.e. is pretty short and punchy), I'll mute all the other parts in the MIDI loop and set Ultrabeat's channel output to 'No Output'.
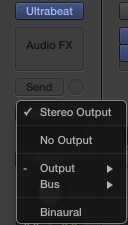
Next, I'll send Ultrabeat's signal to a bus (otherwise it won't show up as a source for sidechaining in the compressor) and also turn the bus output to 'No Output' - now I can select that bus from the sidechain dropdown menus in the compressors loaded onto the keys and guitar channels.

I'm also going to drive the compression quite hard to really pronounce the effect - to do this I just have to lower the compressor's threshold to produce more gain reduction whenever the kick is triggered from Ultrabeat:
It's not a very subtle effect but it really throws weight and emphasis behind those kicks and creates a swaggering momentum throughout the loop.
Here's the same effect but this time using the snares as the source for sidechain compression (I just have to mute the kicks and unmute the snares in my MIDI file to achieve this):

Hopefully you're beginning to see how powerful and flexible the introduction of MIDI is to this process - next let's do some sidechain filtering.
Sidechain Filtering: MIDI Magic Part 2
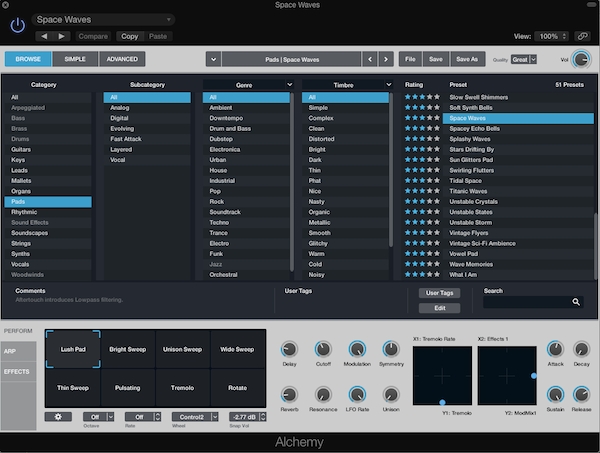
To really emphasise this effect, I want to process a long, constant sound like a pad or synth texture. The only file in the 'Automatic' set of loops like this is the vinyl crackle sample but I want something more substantial, so let's add a string-like synth pad, generated using Logic X's new Alchemy sample-based synth:
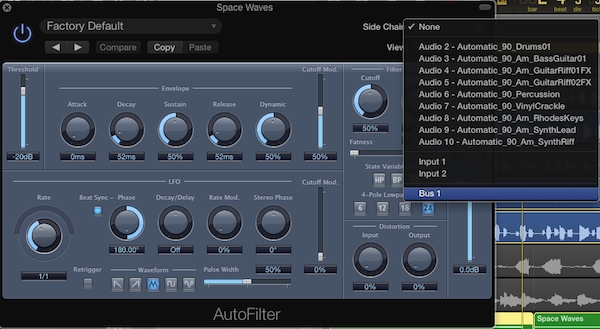
Simple but effective! Now let's add Logic's autofilter plugin on the pad's channel and select our Ultrabeat bus as the sidechain source. Going back to the MIDI file, I'll mute the snares and now unmute the hi hats and shaker part to give our autofiltering some rhythm:
With a little touch of LFO modulation on the cutoff that sounds pretty nice! Now we can do something really nifty - use the kicks to sidechain compress the keys and guitar and at the same time, use the hats and shaker to sidechain filter the pad!
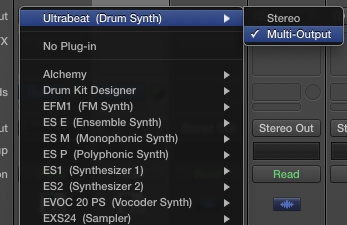
To do this, I need to switch Ultrabeat from a stereo to a multi-output instrument, which I can do simply by clicking on 'Ultrabeat' from Logic's mixer section and choosing this option from the dropdown menu. Now, I hit the small '+' icon such above the solo button, again in the mixer section, to create a 2nd output channel for Ultrabeat.
Next, I send the output from this second Ultrabeat channel to its own bus, turning the master outputs for both to 'No Output' again so we don't actually hear the signals and send the hats and shaker out Ultrabeat's second output from within its interface. Finally, I switch the pad's autofilter sidechain input to bus 2 rather than 1 and hey presto:
All this is accomplished using nothing more than a humble MIDI file and some slick routing! In order to change up the rhythm we're using as our sidechain signal, all we need to do is revisit our MIDI file and do some editing or even play something new in - I've added some extra hat events to create a more involved rhythm for the autofilter side chaining:

To extend the use of this technique even further, don't forget that the MIDI is totally independent of our audio drum loop so we can mute this whenever we like:
So there you have it, MIDI really is a powerful tool in your arsenal when it comes to sidechain processing. I hope you're already imagining ways you can apply the above ideas in your own music - you really can push the technique as far as you want, from busing out 12 different elements of a drum loop to pushing the compression to the point of gating and so on. Get creative and look out for the next article in my MIDI tutorial series coming soon!


