

Today, we're delighted to welcome a guest post from Daniel Strongin to the pages of the ModeAudio Magazine - Daniel is a caffeine-dependent sound designer and traveler, who's obsessed with sharing his knowledge on all things music production through his website, SoundShockAudio.
The mix is a crucial part of the music production process, as it is what turns your musical ideas into polished, well-presented pieces of music.
From adjusting volumes and panning, to EQ and beyond, mixing is all about making things fit – and it turns out that it's much trickier than it sounds!
No matter if you are a beginner or a seasoned professional, we all struggle with our mixes at one point or another. As we learn more about the craft and evolve our own style, our processes must adapt too, which is why picking up a few more tricks is always a good idea.
With this in mind, today I'd like to share with you a list of my top 5 mixing tips that you (probably) aren’t using already, to help you get the music playing in your head sounding better than before. Let's get started!

1. Monitor At A Low Volume
Monitoring at a low overall volume is one of the most overlooked and useful tips when mixing, in my opinion.
The key to any successful mix is the balance that is achieved between all the elements in your track. No one sound should be too loud, jumping all over the mix and no one sound should possess frequencies that sound sit well within the overarching context of the composition.
Before you even begin to start mixing your song and find this balance, you need to have the levels of your monitors set at appropriate (and appropriately low) levels – why, exactly? Because you will notice imbalances much more easily and effectively.
The Fletcher Munson Curve is the technical name for the reason that we should mix our tracks at a lower level. This graph states that certain audio frequencies will be perceived quieter and louder at different listening levels.
At higher volumes, the high and low frequencies become more prominent, while the mid-range gets pushed to the background. At lower volumes, the high and low frequencies are pushed to the background, while the mid-range frequencies are more upfront.
As our ears and aural attention naturally gravitates to the extreme high and low ends of the frequency spectrum, it benefits our mixing ability to subtly accentuate the mid range, which is easier to ignore.
A typical, everyday listening level for music is around 70dB. When you are mixing your track, I recommend that you should be monitoring at 10dB lower then this, as this will help balance your perception of the frequency range and allow you to mix more accurately.
When you're happy with your mix, by all means, crank the volume and get lost in the music – but until you each that point, keep it at 60dB!

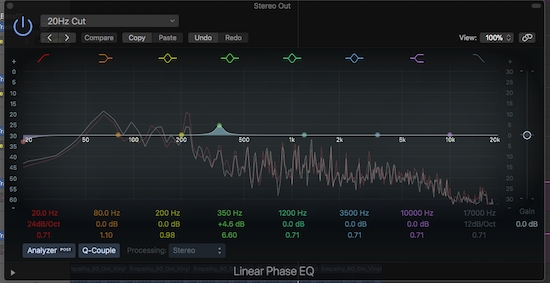
2. Use Left/Right EQ For Stereo Width
Mixes today have a wide stereo image – listen to any early original mix from The Beatles and you'll know exactly what I mean!
With the advancement of stereo imaging plugins and in mixing technique generally, having a wide stereo image is easier than ever before, as well as being pretty much essential if you want your music to stand up to what's in the charts.
One technique that is often overlooked in this area is using a left/right EQ. A left/right EQ is a great tool to use for stereo widening that doesn’t actually involve an inflated or expanded stereo image i.e. you aren't forcing extra width on your mix when using it.
In fact, your stock DAW EQ should have an option for you to EQ the left and right channels separately, so it's a technique you can get cooking with right away.
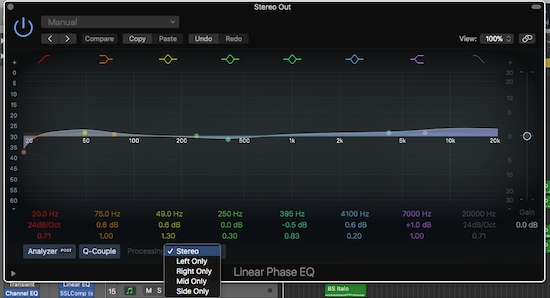
By making independent EQ changes in the left and right channels of your sound or groups of sounds, you can create the perception of width. Your left and right ears will be hearing a slightly different frequency balance, which creates this perception.
It's like if you placed a very short delay on just one channel, which would instantly create an impression of space and depth that wasn't there before.
When using this technique, I recommend focusing on the high frequencies, as our ears are more sensitive to this area in terms of direction than the mids and lows. This has its roots in our hunter-gatherer evolutionary origins, allowing us to more effectively locate high frequency sounds in 3D space.
So, to make this effect as noticeable as possible, try using a high shelf EQ or filter on the sound or sounds that you want to widen. In one channel, boost up the high shelf a few decibels and in the other, reduce the shelf a touch.
This subtle frequency difference will be registered by your ears as a gentle widening of the sound, an effect that falls under the heading of 'Psychoacoustics' – a fascinating discipline well worth researching if you find yourself with a spare couple of hours on a rainy day!

3. Automate Your Master Gain For a Bigger Drop
The drop or chorus in your song is the most important part of the arrangement – it's what everything is leading up to and moving away from. Making sure that this section is as impactful as possible should therefore be one of your main priorities when producing!
The sounds you use in your drop/chorus, how you arrange them and how you mix them together will be the biggest determining factors in how successful this section will be.
Handily, I have one extremely simple yet effective tip that you can apply to your master channel to add a bit more impact to the drop/chorus in your song.
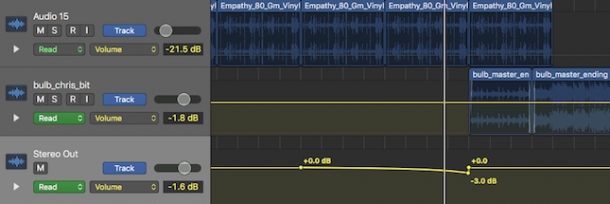
To add this extra impact, try applying a downward volume automation curve to the build-up of your track on the master channel. Have this downward curve stop a quarter note or so before your drop/chorus section starts at around -2 to -3dB.
Next, bring the volume automation curve back up to 0dB right when the drop/chorus hits - the gradual and slight reduction in volume as the build-up progresses and quick return to 0dB, will make your drop/chorus seem louder in comparison, perhaps giving it all the lift it needs to really stand up as the focal point of your tune.
Your ears quickly adjust to the lower volume level over the course of say 4 or 8 bars, then when the volume returns to 0dB your perception is tricked into thinking the drop/chorus is louder then it actually is – it sounds too good to be true but try it, it works wonders!

4. EQ In Key
We have all used an EQ before to boost certain frequencies. When doing so however, we usually don't think of how the key of our song can play a role in the process.
Every note is a snapshot of a particular set of frequencies, usually bundling up the majority of its energy in the root or fundamental frequency. This is typically what we think about when using EQ on each element in our mix.
However, by boosting the frequencies that are in the key of our track, we can often create a more musical and harmonious mix.
For example, let’s say your track is in the key of F minor. If you are looking to put a notch EQ on the master bus of your track and it sounds good around the 300Hz region, try to think if there are any notes in this area that are related to the F minor scale.
You can use this graph to check out the frequency values of specific notes – by taking a look we can easily see that the note of F4 is 349Hz, close to the region we liked the sound of.
F is the root key and note of our track and so things will sound a bit more harmonically pleasing to the ear if we choose to boost specifically at 349Hz instead of more generally at 300Hz.
So, the next time you are looking to boost frequencies, try looking for notes in the key of your track that are close to the area you're interested in and reap the rewards!
5. Use Delays Creatively
Delays are an essential part of any track for adding space, depth and interest. We have all used delay plugins at one point or another on various track elements, but we don’t usually think about them from a mixing stand-point.
Much like the left/right EQ tip above, adding a short delay and panning in the opposite direction to the sound it is applied to can create width and space in your mix – the longer the delay time, the more obvious the effect will become but shorter times can act more like a reverb, helping things gel more smoothly with the elements around them.
To add a creative touch to your delays, you can also add modulation and various other effects plugins to create extra movement and texture. Set things up as follows:
- add your favorite delay plugin to a return/send track
- after this delay, add in one or more modulation (think phaser, flanger, chorus etc), distortion or other FX plugin
- send a small amount of signal from one of your tracks to test the effect, then tweak accordingly
By adding the FX plugins after the delay, you will give your delayed signal a subtly (depending on how many plugins you add) different texture and feel to the original signal that is nevertheless still closely related.
Taking this a step further, you could also automate the parameters of your FX plugins to give the delayed signal more movement and momentum throughout your track.
Mix Master
Mixing your tracks can be a very difficult and, at times, tedious process. Frustratingly, there are no shortcuts to becoming proficient in this area of the production process and no set list of actions will work 100% of the time.
To become more skilled at mixing, you will have to put in the hours of practice and, importantly, take time to indulge in a bit (or a lot) of trial and error.
Picking up as many tips and tricks as you possibly can is only going to give you more tools to try when you get stuck, and so I hope with this article that I've introduced to at least a few tried and tested ideas you aren't already in the habit of using.
Over time you will get a feel for when each of the above tips works best though in my book, number 1 is essential at all times – give them a try and get at least a couple of steps closer to becoming a mix master!


