
If you read my previous article about MIDI routing in Ableton Live, you'll know that I'm a fan of its brilliant MIDI editing interface and MIDI effects. Part of what I like about it is that it makes the task of editing MIDI really quick and easy, so long as you've spent the time to learn what the software can do and how to make it do it properly. In this tutorial, I'm going to show you a few ways that you can use Live's MIDI editor to edit MIDI super quick and also uncover some creative possibilities for writing musical parts, such as chord progressions.
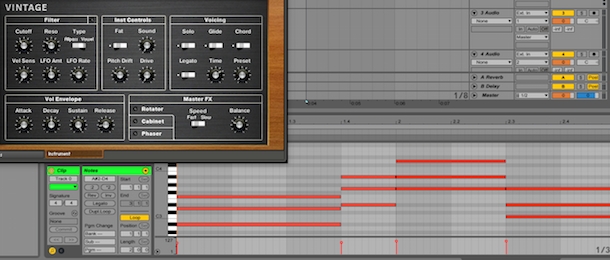
Ableton Super Selector: Shift + Click
First up, it's the insanely useful individual note selection you can see above. This allows you to select just a few notes from a MIDI clip by holding shift whilst you select the notes with your mouse, either by clicking on them or click-dragging into them. Another neat trick is to first select all (Ctrl/Cmd+A) and then deselecting notes. Now you quickly delete all those bum notes you played in one swift action, transpose select notes from a chord progression and shift all the snares in a drum loop 1/16th back'
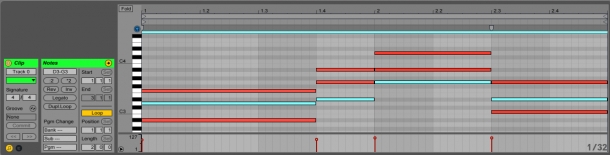
Going Off Grid: Ctrl/Cmd + 3/4
A great tool for programming interesting rhythm tracks is to use the triplet grid. To set this on or off, press Ctrl/Cmd+3. As you can see in the image above, I've switched to the triplet grid and then used selective selection on my kick drum hits to duplicate them out onto the triplet grid (by holding Alt whilst dragging). This can add a nice laid-back feel to a rhythm. You can achieve even looser rhythms by switching off the grid (Ctrl/Cmd+4) altogether, and dragging notes around in 'slip mode'.
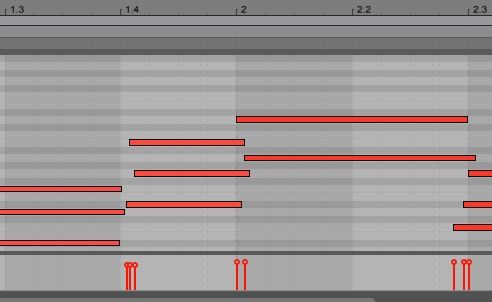
An Eye for Detail: Ctrl/Cmd + 1/2
Ctrl/Cmd+1 and Ctrl/Cmd+2 are both really useful as they let you narrow and widen the grid - so if you're moving notes in a long chord progression and Live's automatically chosen grid is moving notes by 1/4 note or 1/8th when you want to move them by 1/16th, then use Ctrl/Cmd+1 to double up the resolution.
Giant Steps: Shift + Up/Down
A great thing to experiment with quickly is the register of the part you're writing. I find that things like pads or leads often sound better when you play them an octave higher or lower, depending on the material. It's also a better way to move a musical part out the way of another which it is crowding out than reaching straight for an EQ. Luckily, Live makes this really easy - you just need to hold Shift while pressing either the Up or Down keys. Select all first (with Ctrl/Cmd+A) to move the whole part up or down.
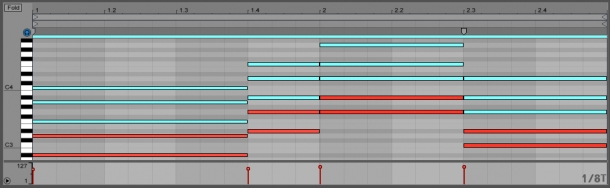
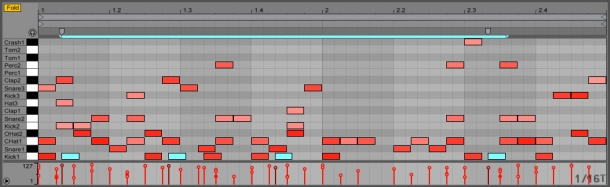
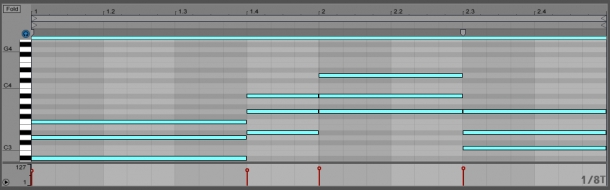
Seeing Double, Hearing Jazz: Shifting Chords Up by 7 or 5 Semitones
A very simple way to use MIDI editing for generating cool musical effects is to duplicate chords and pitch shift them. I've taken the chord progression above, done Select All and then Alt+Dragged it up a perfect fifth, or seven semitones. It now sounds like this:
Nice, huh' The reason this works is that no matter whether your chords are in a major or minor key, when they're shifted up a perfect fifth, they'll remain in key. Other chords would sound wrong, as they'd have major thirds where there should be minor thirds, and vice versa. All apart from the perfect fourth, however - duplicating chords up by five semitones also keeps chords major or minor where they should be. And with my chord progression above, they sound even nicer than the perfect fifth!

I hope I've inspired you to try a couple of these nifty tricks out in Ableton Live - if you learn them, your MIDI programming might just be able to keep up with your ideas!
*Download the MIDI file used in this tutorial here!


