

This may well be the most obvious thing you'll read all year, but we here at ModeAudio reckon loops are a pretty versatile media for music production and sound design in general.
You can use them as they come, fresh out of the digital box, or you can push, pull, squash, squeeze, simmer, shimmer, soak, stoke and fry them beyond all recognition - something approaching the latter is what I want to talk about today and from all the many, many extended uses of loops out there, I want to select one that's very close to my heart: creating ambient layers.
Rather than focusing on the immediate melodic, harmonic and rhythmic content of loops, here we're going to focus on the timbral - the unique tone, texture and sonic flavour each and evert loop possesses. Once we start to listen to loops focusing only on these more subtle sonic elements, we can start to treat them as seeds for new and exciting sound design experiments.
My experiment today will consist of taking a single loop from our Outlook - Electronic Loops & Samples release and spinning it into the beginning of a spaced-out composition far removed from the loop's original context. I hope my demonstration will show you just how far you can take each and every loop featured in our sound packs with just a few neat ideas. Let's dive in!
1. Pitch Around
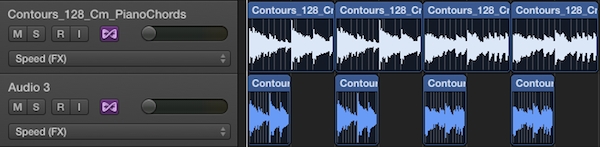
Firstly, I need to find a loop that I like the sound of - after having a dig around the contents of Outlook, I've decided the 'Contours_128_Cm_PianoChords' loop has some very interesting characteristics that will work well in my Ambient track:
From the rich spectral distribution to the audible, textural taps of the hammers hitting strings, I know that this loop will do nicely. Of course, the delicate harmony and chord progression is important too and will give me a number of options when I take the sound into my DAW.
After importing the loop into Logic Pro X, the first thing I want to try is pitching the loop around the scale. I can do this using the Flex Time 'Speed' mode, expanding and contracting the region and listening back to the results. The original BPM of the loop is 128 but I want to shoot for a slower tempo, more befitting my Ambient goal - selecting 110 and pitching the loop down beyond an octave gives us this:

I like the pace and low energy content of the loop at this pitch but it doesn't sound very Ambient yet - enter reverb!
2. Wash Out
When I think of Ambient layers I think of lush, unfurling drones and textures, billowing out from the speakers like clouds of smoke, and this is exactly the direction I want to take the loop in. So, how can I take a percussive, note-heavy piano riff and turn it into a majestic drone' Well, with reverb of course!
By placing a reverb unit directly on the loop's channel in Logic and making sure only the wet signal is heard, we can effortlessly stretch out sounds and make them fill an entire virtual space. With this in mind, I've called up my very favourite reverb unit out there, Space Designer, pulled the Dry control to silence leaving only the wet, reverberant signal sounding, and can now sift through the various impulse response setting till I've found something I like.
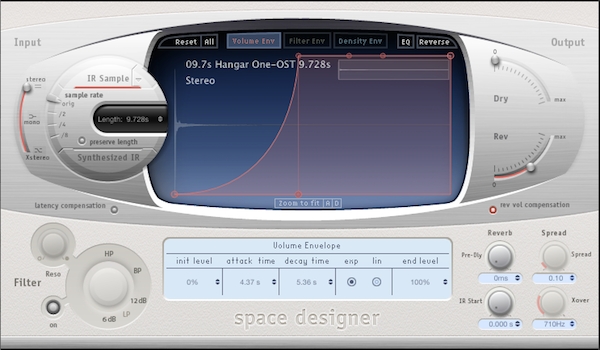
I want something immaculately long and expansive-sounding, so I immediately looked through the Large Spaces folder, finding an impulse called 'Hangar One' in Indoor Spaces. However, I want to cut out the attacks from the loop, leaving just those smooth decays to build up my drone - I can do this by applying a gradually fading in amplitude envelope to the impulse inside Space Designer, giving us this result:
It's getting there but I still feel the drone is a bit busy - I can correct this by removing portions from the original loop. If I cut out every 2nd bar then I'll simplify things whilst keeping the shift from the first chord to the second apparent - I also want to apply some EQ to bring out the lows in the drone. Here's the result:

Now we have the basis for my Ambient track - all I need to do next is get layering!
3. Stacking Shelves
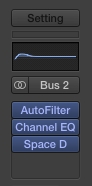
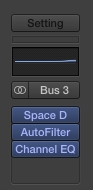
My next goal is to fill out the frequency spectrum with complementary drones, so I'll create 3 bus tracks and label them 'low', 'mid' and 'treble'. Now I can send my original drone to these bus tracks and process them separately to achieve different, yet related effects. I can also choose to have these layers follow the original drone's rhythm, or I can stretch them out even further for some extra sonic wash.

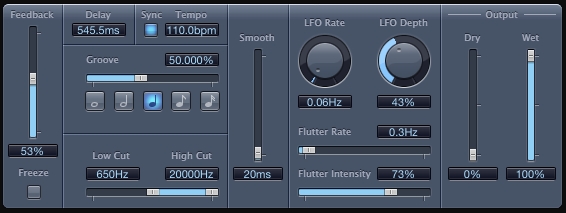
Starting with the mid track, I've decided I want this layer to echo out beyond the original - to achieve this, I've called up a Tape Delay plugin and second Space Designer, as well as an EQ to sculpt out some of the lows and boost the highs. Using the same trick as above, I can take out all the dry signal within Space Designer, leaving only the echoing, delayed signal. Using a second reverb unit also helps to give this layer subtly different tonal character for diversity, which sounds like this:
Doing much the same thing on the bass bus track, using EQ for boosting the lows and another Space Designer to introduce some additional character, as well as introducing a low pass filter to cut out rather than just reduce the high frequencies, produces this:
I'm going to do something a little different for the treble track however - my original drone doesn't contain very much high mid to treble energy, owing to the fact I pitched it down more than an octave. So, rather than sending the original drone through this track, I'm doing to duplicate it twice and pitch the regions back up one and then two octaves using Flex Time.
I don't want to actually hear either of these tracks however, so I've set their track volumes to silence whilst changing the bus send type to 'pre fader', ensuring the their signals will get through to my treble bus track. Using a copy of the same original Space Designer unit with the hanger impulse loaded, alongside a high pass filter and treble EQ boost gives us this drone:
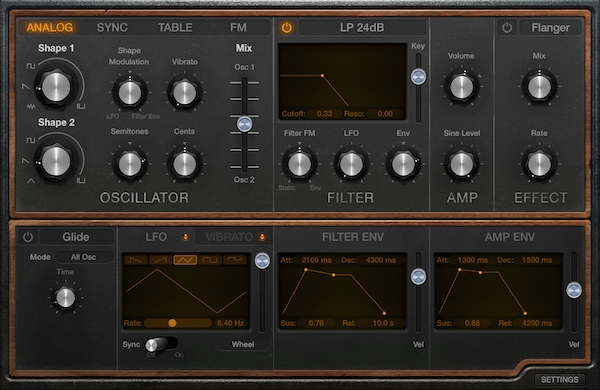
Combined, these loops are really beginning to fill out the spectrum, however I still feel we're lacking in root note orientation. Big, deep bass notes will really help to underpin the drones I've created so far and there's no synth better suited to the job than Logic's Retro Synth! Minimally adjusting the default patch to cut out the higher parts of the sound, spacing the oscillators an octave apart and recording in some root notes takes thing to here:
So far so Ambient! I feel the track could really use some percussive texture for variety however - rather than calling on a new loop, sample or synth to provide this, I'd much rather make use of what I already have. Once again, a few plugins and some production know-how is the answer!
4. Teasing Texture
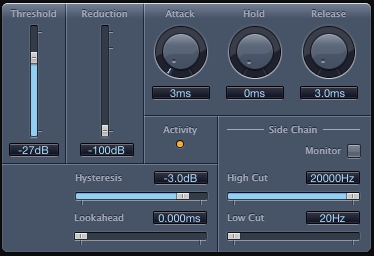
Creating something percussive and rhythmic from drones might seem like a tall order at first, but it becomes a much simpler task thanks to Logic's Noise Gate plugin. Creating a new bus track and sending some of my drone bus tracks into it, I can ride the Noise Gate's threshold setting until I hit the sweet-spot of causing the gate to snap open and closed in quick succession - adding some overdrive for crunch, chorus for width, bit-crushing for even more crunch and finally some EQ to sculpt out the lows produces this textured sound:
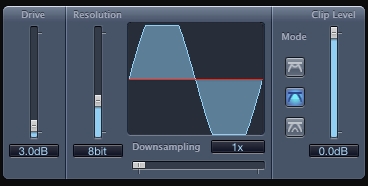
As a final layer, I want to add a subtle wash of noise to pepper over everything I've created above - again however, I don't just want to drag in a new sound. Sending my original drone to yet another bus track, adding the Bit Crusher plugin and pulling the Resolution down to 8bit, as well as adding some chorus to create a little stereo movement produces this:
I feel like this track idea is really starting to go somewhere and, apart from one soft synth track, it has all been generated by a single loop and some plugins!
Of course this sorts of Ambient layers aren't restricted for use in Ambient productions, you can use them to sprinkle over productions of virtually any type - here's how the above track sounds with a heavily delayed beat, for example:
As usual, you can take these ideas and run as far as you like with them, so I hope the above demonstration has already created some bright sparks for you as to where you can take your next track. Good luck with your experiments and get creative!


